Quantcast
Channel: Ivanovo
Viewing all 83 articles
Browse latest View live

Flashing ROM to Samsung Phone

$
0
0

On Linux there is a great Heimdall tool.  I used it recently to flash stock ROM and custom recovery (TWRP) to my old Samsung S3 mini. Best to be used from command line.

Heimdall is in Ubuntu repos (or build from source):

sudo apt-get install heimdall-flash

Steps to flash:

  1. Restart phone in download mode – push all tree button: Vol -, Home, Power
  2. Connect to USB
  3. sudo heimdall detect

    Heimdall must always run as root.
    If phone is not found try other USB ports ( worked only on one in my notebook).
  4. Get PIT in readable form:
    sudo heimdall print-pit >myphone_pit.txt
  5. Unzip, untar ROM archive
  6. Match file names to partition names – look into PIT dump:
    — Entry #21 —
    Binary Type: 0 (AP)
    Device Type: 2 (MMC)
    Identifier: 20
    Attributes: 5 (Read/Write)
    Update Attributes: 5 (FOTA)
    Partition Block Size/Offset: 524288
    Partition Block Count: 2457600
    File Offset (Obsolete): 0
    File Size (Obsolete): 0
    Partition Name: SYSTEM
    Flash Filename: system.img
    FOTA Filename:
  7. Flash partitions –  in case of stock ROM I did not have to flash all (probably because re-flashing same ROM back):
    sudo heimdall flash --Kernel boot.img --CACHEFS cache.img --Kernel2 recovery.img --SYSTEM system.img

    To flash custom recovery:
    sudo heimdall flash --Kernel2 ~/tmp/recovery.img


SQL or NoSQL – Why not to use both (in PostgreSQL)

$
0
0

NoSQL databases have become very popular in last years and there is a plenty of various options available. It looks like traditional relational databases (RDBMs) are almost not needed any more. NoSQL solutions are advertised as faster, more scalable and easier to use. So who would care about relations, joins, foreign keys and similar stuff (not talking about ACID properties, transactions, transaction isolation)? Who would,  if NoSQLs can make your life much easier. But there is a key insight about NoSQL databases – their wonderful achievements are possible because they made their life easier too is some aspects. But that comes with some price – would you be happy, if your bank will store your saving in MongoDb?

However there are many environments, where NoSQL databases shine – especially when there are huge amounts of simple data structures, which need to be scaled massively across the globe and where these data are not of much value – solutions like social networks, instant messaging etc. are not so much concerned about data consistency or data loss, because these data are basically valueless. (Their business model is just based on sharing absolutely trivial data, where one piece can be easily replaced with another and it does not matter if some pieces are lost. Consider – what will happen if whole Facebook will go away in one minute? Nothing! Few people will be pissed off because they think their online profile was cool, few sad that they cannot share their meaningless achievements with so called ‘friends’, but generally considered nothing special will happen and no real value will be lost. People will just switch to another provider and fill it’s database with tons of trivialities and will easily forget about data in their previous account).

I don’t want to create impression that NoSQL databases are useless, they are very good for certain scenarios (and we need to remember that NoSQL is rather broad category, it includes structured documents stores, key-value stores, object databases etc. – each one has it’s particular niche, where it excels), but relational databases are also good, actually very good. Relational model is fairly good abstraction of very many real world situations, data structures, entities, however we call them. And relational databases provide solid tools to works with them. So it make sense to use them in many cases. It might bit more difficult to start with relational database then with schema-less document store, but  in the long run it should pay off. And what is really nice it’s not about one or another solution, but we can use both and combine them smartly and inventively.
So enough of general mumbo jumbo – let’s get to my particular case – I’ve been looking for data store for my new project and considered to try MongoDb this time ( while in past I stuck to relational DBs), however finally decided for PostgreSQL (again) – and I’d like to share some tests, findings and thoughts.

For data I’ll use this relational model (simplified):

erd

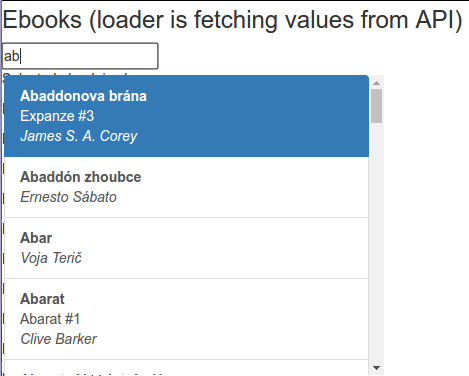
This is basically commonly referred author – book schema (used in many database examples),  but here to make it more real life like the relationship between authors and books is many-to-many.  Data are taken from my previous project mybookshelf – approximately 30k+ books and ~10k authors – so relatively small database – but with the real data.

I’ve played with these 3 set-ups:

  • classical relationship data store – PostgreSQL 9.5, accessed from python with psycopg2 and SQLAlchemy ORM.
  • MongoDB 3.2.5 – in order to leverage capabilities of document based approach, data schema is flattened into one document. Mongo is accessed from pymongo.only
  • Use PostgreSQL 9.5 JSONB  type for structured documents –  same flattened schema as in Mongo.

By no means these tests should be considered as benchmarks, for that purpose they are too simplistic.  Rather it should be considered as quick peek into particular data stores capabilities.

Basic stuff

Let’s start with something simple (all examples are from IPython notebook running Python 3.4):

Get all ebooks via SQLAlchemy ORM:

%timeit x=s.query(model.Ebook).all()
1 loop, best of 3: 1.67 s per loop

It seems to be be quite slow, what about Mongo?

%timeit x=list(db.ebooks.find())
1 loop, best of 3: 379 ms per loop

Yes, Mongo is significantly faster, however we should not forget that ORM is doing much much more then just loading data – it maps data to objects, observes objects changes, maintains local ‘unit of work’ context etc. This extra functionality costs us many cycles.  Especially if we work with many objects like here.  However we can always step back to plain SQL:

%timeit all=list(engine.execute('select * from ebook'))
1 loop, best of 3: 249 ms per loop

Here performance is even slightly better then in Mongo. But it does not retrieve details for each book – if we want all details we have to join ebook table with other tables, this is the query ORM executes in background:

q="""SELECT ebook.id AS ebook_id, ebook.created AS ebook_created, ebook.modified AS ebook_modified, ebook.title AS ebook_title, ebook.description AS ebook_description, ebook.language_id AS ebook_language_id, ebook.series_id AS ebook_series_id, ebook.series_index AS ebook_series_index, ebook.rating AS ebook_rating, ebook.cover AS ebook_cover, ebook.modified_by_id AS ebook_modified_by_id, ebook.created_by_id AS ebook_created_by_id, language_1.id AS language_1_id, language_1.code AS language_1_code, language_1.name AS language_1_name, series_1.id AS series_1_id, series_1.created AS series_1_created, series_1.modified AS series_1_modified, series_1.title AS series_1_title, series_1.rating AS series_1_rating, series_1.description AS series_1_description, series_1.modified_by_id AS series_1_modified_by_id, series_1.created_by_id AS series_1_created_by_id, author_1.id AS author_1_id, author_1.created AS author_1_created, author_1.modified AS author_1_modified, author_1.last_name AS author_1_last_name, author_1.first_name AS author_1_first_name, author_1.description AS author_1_description, author_1.modified_by_id AS author_1_modified_by_id, author_1.created_by_id AS author_1_created_by_id 
FROM ebook JOIN language AS language_1 ON language_1.id = ebook.language_id LEFT OUTER JOIN series AS series_1 ON series_1.id = ebook.series_id LEFT OUTER JOIN (ebook_authors AS ebook_authors_1 JOIN author AS author_1 ON author_1.id = ebook_authors_1.author_id) ON ebook.id = ebook_authors_1.ebook_id ORDER BY author_1.id"""

%timeit cursor.execute(q); x= cursor.fetchall()
1 loop, best of 3: 476 ms per loop

OK joins take  time – we know that – but it’s not that bad – still roughly comparable with Mongo.

And now let’s look at PostgreSQL document solution – selecting from one table with JSONB column ( same JSON data as in Mongo):

%%timeit
cur.execute('select doc from ebook')
cur.fetchall()
1 loop, best of 3: 772 ms per loop

Interesting – why it takes longer then relational model?

In web applications usually we work with fewer records (paginated, sorted) – so let’s see how it looks if we limit number of rows and sort them (no index yet):

%timeit x=session.query(model.Ebook).order_by(model.Ebook.title).limit(100).all()
100 loops, best of 3: 21.8 ms per loop

%timeit x=list(db.ebooks.find().sort([('title', pymongo.ASCENDING)]).limit(100))
100 loops, best of 3: 2.65 ms per loop

%timeit x=list(engine.execute(model.Ebook.__table__.select().order_by('title').limit(100)))
100 loops, best of 3: 2.79 ms per loop

q="""SELECT ebook.id AS ebook_id, ebook.created AS ebook_created, ebook.modified AS ebook_modified, ebook.title AS ebook_title, ebook.description AS ebook_description, ebook.language_id AS ebook_language_id, ebook.series_id AS ebook_series_id, ebook.series_index AS ebook_series_index, ebook.rating AS ebook_rating, ebook.cover AS ebook_cover, ebook.modified_by_id AS ebook_modified_by_id, ebook.created_by_id AS ebook_created_by_id, language_1.id AS language_1_id, language_1.code AS language_1_code, language_1.name AS language_1_name, series_1.id AS series_1_id, series_1.created AS series_1_created, series_1.modified AS series_1_modified, series_1.title AS series_1_title, series_1.rating AS series_1_rating, series_1.description AS series_1_description, series_1.modified_by_id AS series_1_modified_by_id, series_1.created_by_id AS series_1_created_by_id, author_1.id AS author_1_id, author_1.created AS author_1_created, author_1.modified AS author_1_modified, author_1.last_name AS author_1_last_name, author_1.first_name AS author_1_first_name, author_1.description AS author_1_description, author_1.modified_by_id AS author_1_modified_by_id, author_1.created_by_id AS author_1_created_by_id 
FROM ebook JOIN language AS language_1 ON language_1.id = ebook.language_id LEFT OUTER JOIN series AS series_1 ON series_1.id = ebook.series_id LEFT OUTER JOIN (ebook_authors AS ebook_authors_1 JOIN author AS author_1 ON author_1.id = ebook_authors_1.author_id) ON ebook.id = ebook_authors_1.ebook_id ORDER BY ebook.title, author_1.id limit 100"""

%timeit cursor.execute(q); x= cursor.fetchall()
10 loops, best of 3: 110 ms per loop

Last result looks bit weird – why joined select takes longer then ORM fetch?  It’s  because this query is  suboptimal –  it is better first to limit ebook rows and then join – this is actually what happens in ORM fetch:

q="""SELECT anon_1.ebook_id AS anon_1_ebook_id, anon_1.ebook_version_id AS anon_1_ebook_version_id, anon_1.ebook_created AS anon_1_ebook_created, anon_1.ebook_modified AS anon_1_ebook_modified, anon_1.ebook_title AS anon_1_ebook_title, anon_1.ebook_description AS anon_1_ebook_description, anon_1.ebook_language_id AS anon_1_ebook_language_id, anon_1.ebook_series_id AS anon_1_ebook_series_id, anon_1.ebook_series_index AS anon_1_ebook_series_index, anon_1.ebook_rating AS anon_1_ebook_rating, anon_1.ebook_cover AS anon_1_ebook_cover, anon_1.ebook_modified_by_id AS anon_1_ebook_modified_by_id, anon_1.ebook_created_by_id AS anon_1_ebook_created_by_id, language_1.id AS language_1_id, language_1.version_id AS language_1_version_id, language_1.code AS language_1_code, language_1.name AS language_1_name, series_1.id AS series_1_id, series_1.version_id AS series_1_version_id, series_1.created AS series_1_created, series_1.modified AS series_1_modified, series_1.title AS series_1_title, series_1.rating AS series_1_rating, series_1.description AS series_1_description, series_1.modified_by_id AS series_1_modified_by_id, series_1.created_by_id AS series_1_created_by_id, author_1.id AS author_1_id, author_1.version_id AS author_1_version_id, author_1.created AS author_1_created, author_1.modified AS author_1_modified, author_1.last_name AS author_1_last_name, author_1.first_name AS author_1_first_name, author_1.description AS author_1_description, author_1.modified_by_id AS author_1_modified_by_id, author_1.created_by_id AS author_1_created_by_id 
FROM (SELECT ebook.id AS ebook_id, ebook.version_id AS ebook_version_id, ebook.created AS ebook_created, ebook.modified AS ebook_modified, ebook.title AS ebook_title, ebook.description AS ebook_description, ebook.language_id AS ebook_language_id, ebook.series_id AS ebook_series_id, ebook.series_index AS ebook_series_index, ebook.rating AS ebook_rating, ebook.cover AS ebook_cover, ebook.modified_by_id AS ebook_modified_by_id, ebook.created_by_id AS ebook_created_by_id 
FROM ebook ORDER BY ebook.title 
 LIMIT 100) AS anon_1 JOIN language AS language_1 ON language_1.id = anon_1.ebook_language_id LEFT OUTER JOIN series AS series_1 ON series_1.id = anon_1.ebook_series_id LEFT OUTER JOIN (ebook_authors AS ebook_authors_1 JOIN author AS author_1 ON author_1.id = ebook_authors_1.author_id) ON anon_1.ebook_id = ebook_authors_1.ebook_id ORDER BY anon_1.ebook_title, author_1.id"""

%timeit list(engine.execute(q))
100 loops, best of 3: 5.64 ms per loop

That’s better – Mongo is still faster, but not so much.

Complex query

Now let’s try a complex search across several attributes –  returns records where all words are found either in book title,  series or authors name:

def build_search_expr(q):
    def create_and(field):
        return and_(*map(lambda v: func.unaccent(field).ilike(v),q))
    q=map(lambda x: x.strip(), q.split())
    q=list(map(lambda x: func.unaccent('%%%s%%'%x),q))
    return or_(create_and(model.Ebook.title), create_and(model.Series.title), 
               create_and(func.concat(model.Author.first_name, ' ',  model.Author.last_name)))

def build_search(session,q):
    return session.query(model.Ebook).outerjoin(model.Author, model.Ebook.authors)\
    .outerjoin(model.Series).filter(build_search_expr(q))

%timeit build_search(session,'karel capek')\
.limit(5).all()
10 loops, best of 3: 39.5 ms per loop

and Mongo equivalent:

def mongo_build_search(q):
    def create_and(field):
        return {'$and': list(map(lambda x: {field:{'$regex':x,'$options': 'i'}},q))}
    def create_and2(field, field2):
        return {'$and': list(map(lambda x: {'$or':[{field:{'$regex':x,'$options': 'i'}}, {field2:{'$regex':x,'$options': 'i'}}]},q))}
    q=list(map(lambda x: x.strip(), q.split()))
    return {'$or':[create_and('title'), create_and('series'), create_and2('authors.lastname', 'authors.firstname')]}

%timeit list(c.ebooks.ebooks.find(mongo_build_search('karel čapek'))[:5])
The slowest run took 179.87 times longer than the fastest. This could mean that an intermediate result is being cached.
1 loop, best of 3: 2.71 ms per loop

Mongo is again faster, but PostgreSQL solution is better, because it searches without diacritics (something very important for us living in the middle Europe).  I did not find any easy way how to do it in Mongo (only in full text search – which is discussed below).

Again ORM has some extra costs, but even direct SQL query is slower then Mongo:

q=select([ebook]).select_from(ebook.outerjoin(series).outerjoin(ebook_authors).join(author)).where(build_search_expr('karel capek'))
%timeit list(engine.execute(q.limit(5)))
100 loops, best of 3: 12.9 ms per loop

We can do same query also for PostgreSQL JSONB documents:

def build_search_expr(q):
    def create_and(field):
        return " and ".join(map(lambda v: "unaccent(%s) ilike %s"%(field,v),q))
    q=map(lambda x: x.strip(), q.split())
    q=list(map(lambda x: "unaccent('%%%s%%')"%x,q))
    terms=[create_and("b.doc->>'title'"), create_and("b.doc->>'series'"), 
           create_and("concat(a.value->>'firstname', ' ', a.value->>'lastname')")]
    return ' or '.join(terms)
           
print (build_search_expr('karel capek'))

%%timeit
search="karel čapek"
cur.execute("select b.id, b.doc from ebook b, jsonb_array_elements(b.doc->'authors') a where %s limit 5" % \
           build_search_expr(search))
cur.fetchall()
The slowest run took 184.14 times longer than the fastest. This could mean that an intermediate result is being cached.
1 loop, best of 3: 2.13 ms per loop

So even faster then Mongo and with diacritics insensitive match. But  note about caching in result would be probably true, because if  I try similar query without limit (there are approximately 50 matches in total), query takes much longer:

search="karel čapek"
cur.execute("select b.id, b.doc from ebook b, jsonb_array_elements(b.doc->'authors') a where %s" % \
           build_search_expr(search))
cur.fetchall()
1 loop, best of 3: 364 ms per loop

while Mongo is faster for all results:

%timeit list(c.ebooks.ebooks.find(mongo_build_search('karel čapek')))
10 loops, best of 3: 96.9 ms per loop

 Full Text Search

Both Mongo and PostgreSQL offer full text search. In PostgreSQL a column (full_text) was added to ebook table containing full text search data (TSVECTOR), concatenation of  title, series title and all authors names. Both PostgreSQL and Mongo use full text index and support case insensitive, diacritics insensitive search.

%%timeit
search="capek & karel"
session.query(model.Ebook).filter(model.Ebook.full_text.match(search))\
.order_by(desc(func.ts_rank_cd(model.Ebook.full_text, func.to_tsquery(text("'custom'"), search))))\
.all()
100 loops, best of 3: 15.8 ms per loop

Again we can assume there is significant ORM overhead, let’s look at pure sql query:

search='capek & karel'
q=select([ebook]).where(text("full_text @@ to_tsquery('custom', '%s')"%search)).order_by(text("ts_rank_cd(full_text, to_tsquery('custom', '%s')) desc"%search))

%timeit list(engine.execute(q))
100 loops, best of 3: 2.86 ms per loop

And Mongo:

%%timeit
list(client.ebooks.ebooks.find({"$text":{"$search":"karel capek"}},
                          projection={"score":{"$meta":"textScore"}},
                             sort=[("score", {"$meta": "textScore"})] ))
100 loops, best of 3: 10.5 ms per loop

In fulltext search PosgreSQL is faster.

Updates

I was focused mostly on queries – because my use case will be mostly read orientated, but could not resist to test updating author name, where I expected relational database to  really excel due to it’s data representation.

%%timeit -n1 -r1
a=session.query(model.Author).filter_by(first_name='Karel', last_name='Čapek').one()
a.first_name='Karlicek'
session.commit()
1 loop, best of 1: 55.1 ms per loop

Nor so fast, what about Mongo?

%%timeit -n1 -r1
res=client.ebooks.ebooks.update_many({'authors.lastname':'Čapek', 'authors.firstname':'Karel'}, 
{'$set':{'authors.$.firstname': 'Karlicek'}})
1 loop, best of 1: 6.58 ms per loop

Ooops – why PostgreSQL is so slow – maybe it’s again ORM part. Let’s look at pure SQL update:

conn=engine.connect()
%timeit -n1 -r1 conn.execute("update author set first_name='Karel' where last_name='Čapek' and first_name='Karlicek'")
conn.close()
1 loop, best of 1: 53.2 ms per loop

OK it looks like update time is spent in the database. Well done Mongo,  I did not really expect so fast updates.

PostgreSQL JSONB Fun

PostgreSQL offers many useful  operators and functions, with which we can create different queries – functionality is roughly comparable with Mongo.  Few examples below:

@> operator find document containing given json:

%%timeit    
cur.execute("""select doc->'title' from ebook where doc @> '{"authors":[{"lastname":"Adams"}]}'::jsonb limit 5""")
cur.fetchall()
The slowest run took 2734.04 times longer than the fastest. This could mean that an intermediate result is being cached.
1 loop, best of 3: 167 µs per loop

That’s superfast, compare with Mongo:

%timeit list(client.ebooks.ebooks.find({"authors.lastname":"Adams"}).limit(5))
The slowest run took 29.50 times longer than the fastest. This could mean that an intermediate result is being cached.
1000 loops, best of 3: 318 µs per loop

->> extracts text and can be used for instance  in where clause:

%%timeit
cur.execute("""select doc->'title' from ebook where doc->>'title' ilike 'ca%' """)
cur.fetchall()
10 loops, best of 3: 41.6 ms per loop

we can use join on JSONB array to get distinct authors:

%%timeit
cur.execute("""select  distinct a.value->>'lastname', a.value->>'firstname' from ebook b, jsonb_array_elements(b.doc->'authors') a 
""")
list(cur)
10 loops, best of 3: 96.3 ms per loop

or use it to get count of books per author:

%%timeit
cur.execute("""select  a.value->>'lastname' as lastname, a.value->>'firstname', count(b.id) as num_books from ebook b, jsonb_array_elements(b.doc->'authors') a 
group by a.value order by lastname
""")
list(cur)[:10]
10 loops, best of 3: 133 ms per loop

And we can do much more …

Conclusion

There are many different databases and they differ much in functionality and targeted usage. Despite of current  popularity of NoSQL databases, traditional relational databases (RDBMs) are viable solutions for many applications storage needs including dynamic web applications. RDBMs are rock solid and proven in many battles. They are know to be reliable and scalable.
Just performance should not be the main selection criteria,  unless such performance is really and truly needed. RDBMs can offer much in area of reliability and data consistency. Neither ease of use should be overestimated – there is a good reason why relational databases are more complex.
I personally would prefer RDMS like PostgreSQL as a default choice, unless there is very good reason to use other (NoSQL) database.  And even in these cases, not all data must go to other database – we can use it for instance as a ‘data cache’   for fast reads from replicated servers.
And when looking for document based stores or key-value stores, we do not have to leave PostgreSQL environment, because it provides very solid solutions also in this area (JSONB and HSTORE).

Functional Fun with Asyncio and Monads

$
0
0

Python 3.4+ provides excellent Asyncio library for asynchronous tasks scheduling and asynchronous I/O operations.   It’s similar to gevent, but here tasks are implemented by generator based coroutines.  Asynchronous I/O is useful for higher I/O loads, where it usually achieves better performance and scalability then other approaches (threads, processes). About a year ago I played with OCaml, where light weight threads/ coroutines and asynchronous I/O  approaches  are also very popular (Ocaml has same limitation for threading as Python – a global lock) and there were two great libraries – lwt and core async.  Both libraries use monads as a programming style to work with asynchronous tasks. In this article we will try to implement something similar on basis of asyncio library. While our solution will  probably not provide “pure” monads it’ll still be fun and we’ll learn something about asyncio.

Monad is a term from category theory, but mostly it’s know by it’s usage in functional programming (in Haskell monads play a key role in the language).  I never got into depth of monads theory, but from practical perspective they are quite similar to pipe operator in unix shell – they enable to chain operations together, where result of one operation is fed as input to another operation. For this purpose monads define two functions – unit – which turns some value into monadic type and bind, which unpacks value from monadic type, calls a function on it and returns function’s result packed as monadic type again. If this is not clear look around for various tutorial about monads (such tutorials were very popular several years ago).

Monads have cool application in asynchronous programming,  because we can use them to express a set of serial tasks – something we would write in shell like:
cat "something" | task1 | task2 | task3
This in  monadic terms can be written as: unit "something"  bind task1 bind task2  bind task3
If bind is represented as a pipe operator we can achieve same concise syntax as above.

For Javascript programers  this sounds quite similar to Promise –
fetch('http://something').then(task1).then(task2).then(task3)
and you are quite right – Promise is ‘kind of’ monad – see here.  Asyncio has similar construct called Future, which we will use later.

Python is multi-paradigm programming language, with a lot of functional features.  So let’s see if we can use monadic approach also with asyncio.  This could also serve as a small introduction into asyncio.

We start with this trial example:

def staight():
    #1st task
    print('Hello')
    #2nd task
    print('World')
    x=10
    #3rd task
    print(x)
    
staight()

I assume output of this code would be obvious  (or left as exercise to a reader), more interesting for future comparisons  would be its running time:

10 loops, best of 3: 8.97 µs per loop

Lets try now to implement the same with asyncio (using still python 3.4 syntax, 3.5 syntax  is indeed better, but 3.5 is not yet so common), first some common code:

import asyncio
from asyncio import coroutine as coro
loop=asyncio.get_event_loop()

and run those 3 trivial tasks in asyncio loop:

@coro
def s1(x):
    print('Hello')
    
@coro
def s2(x):
    print('World')
    return 10

@coro 
def s3(x):
    print(x)
    
@coro
def run_async():
    yield from s1(None)
    x=yield from s2(None)
    yield from s3(x)
    
loop.run_until_complete(run_async())

Same output, much more code, and it runs longer time:

10 loops, best of 3: 177 µs per loop

Asyncio has indeed some overhead – tasks have to be scheduled and then picked by internal event loop. While it’s wasteful overhead for this trivial example, it’ll make more sense for complex cases  we’ll see later.

Now back to monads. Let’s create monadic wrapper for asyncio – Async class.  We can use constructor as unit function and our class also implements bind method. Since python is dynamic language, we can use Async for several types – plain values, callables and futures. We also add two overloaded  operators (| and >>) to represent the bind function.

import asyncio
import logging
import traceback
logger=logging.getLogger('monadic')

class TaskError(Exception):
    pass

def check_result(f, chained=None):
    if f.exception():
        if chained:
            chained.set_exception(f.exception())
        raise TaskError()
    elif f.cancelled():
        logger.debug('%s was cancelled' % f)
        if chained:
            chained.cancel()
        raise TaskError()
    else:
        return f.result()

def pass_result(resolved,unresolved):
    if resolved.exception():
        unresolved.set_exception(resolved.exception())
    elif resolved.cancelled():
        unresolved.cancel()
    else:
        unresolved.set_result(resolved.result())

def assure_coro_fn(fn_or_coro):
    if asyncio.iscoroutinefunction(fn_or_coro):
        return fn_or_coro
    elif callable(fn_or_coro):
        return asyncio.coroutine(fn_or_coro)
    else:
        raise ValueError('Paremeter is not method, function or coroutine')

class Async(object):
    def __init__(self, work, *args, **kwargs):
        if isinstance(work, asyncio.Future):
            self._future=work
        elif asyncio.iscoroutine(work):
            self._future=asyncio.async(work)
        elif callable(work):
            self._future=asyncio.async(assure_coro_fn(work)(*args, **kwargs))
        else:
            self._future=asyncio.async(asyncio.coroutine(lambda: work)())
        self._chained=None

    def bind(self, next_work):
        next_work=assure_coro_fn(next_work)
        def resolved(f):
            try:
                res=check_result(f, self._chained)
            except TaskError:
                return
            t=asyncio.async(next_work(res))
            t.add_done_callback(lambda f: pass_result(f, new_future))

        new_future=asyncio.Future()
        next_async=Async(new_future)
        self._chained=new_future
        self._future.add_done_callback(resolved)
        return next_async

    def __rshift__(self, other):
        return self.bind(other)

    def __or__(self, other):
        return self.bind(other)

    @property
    def future(self):
        return self._future

Actual implementation of unit(constructor) and bind could be fairly simple, but for practical reasons we need to add more code to handle exceptions and cancellations – both have to be propagated through chained operations to the last one.

With our new class we can write (using >> operator):

a=Async(lambda: print('Hello')) >> (lambda x: print('World') or 10) >> (lambda x: print('%s'%x))
loop.run_until_complete(a.future)

This will add yet some small overhead to execution, but the code is definitely shorter:

10 loops, best of 3: 316 µs per loop

Or we can do do the same with already defined coroutines and pipe operator (same semantic as >>, use whatever feels more convenient):

a=Async(s1) | s2 | s3
loop.run_until_complete(a.future)

We can also modify our Async class for another great python3 library –  concurrent.futures, which creates asynchronous tasks in either thread or process pool:

import concurrent.futures as cf
import logging
import traceback
logger=logging.getLogger('monadic_cf')

class TaskError(Exception):
    pass

def check_result(f, chained=None):
    if f.exception():
        #logger.error('Exception on future %s' % f.exception())
        if chained:
            chained.set_exception(f.exception())
        raise TaskError()
    elif f.cancelled():
        logger.debug('%s was cancelled' % f)
        if chained:
            chained.cancel()
        raise TaskError()
    else:
        return f.result()

def pass_result(resolved,unresolved):
    if resolved.exception():
        unresolved.set_exception(resolved.exception())
    elif resolved.cancelled():
        unresolved.cancel()
    else:
        unresolved.set_result(resolved.result())


class AsyncCF(object):
    _executor=cf.ThreadPoolExecutor(4)
    def __init__(self, work, *args, **kwargs):
        try:
            self._executor=kwargs.pop('executor')
        except KeyError:
            raise ValueError('Supply executor')
        if isinstance(work, cf.Future):
            self._future=work
        elif callable(work):
            self._future=self._executor.submit(work,*args, **kwargs)
        else:
            self._future=self._executor.submit(lambda: work)
        self._chained=None

    def bind(self, next_work):
        if not callable(next_work):
            raise ValueError('Expected callable')
        def resolved(f):
            try:
                res=check_result(f, self._chained)
            except TaskError:
                return
            t=self._executor.submit(next_work, res)
            t.add_done_callback(lambda f: pass_result(f, new_future))


        new_future=cf.Future()
        next_async=AsyncCF(new_future, executor=self._executor)
        self._chained=new_future
        self._future.add_done_callback(resolved)
        return next_async

    def __rshift__(self, other):
        return self.bind(other)

    def __or__(self, other):
        return self.bind(other)

    @property
    def future(self):
        return self._future

    @property
    def result(self):
        if self._future.exception():
            raise self._future.exception()
        return self._future.result()

    def wait_finished(self):
        cf.wait([self._future])
        return self.result

With this class we can write:

ex=cf.ThreadPoolExecutor(4)

a=AsyncCF(lambda: print('Hello'), executor=ex) >> (lambda x: print('World') or 10) >> (lambda x: print('%s'%x))
a.wait_finished()

Actual execution  (when thread pool is started) takes approximately same time as in asyncio:

10 loops, best of 3: 275 µs per loop

We can try also process pool – here we have to consider one important limitation –  it can execute only serializable  (by pickle module) objects, so we cannot use lambda or local functions – only top level functions:

ex=cf.ProcessPoolExecutor()

def s1():
    print('Hello')
    
def s2(x):
    print('World')
    return 10

def s3(x):
    print(x)

a=AsyncCF(s1, executor=ex) >> s2 >> s3
a.wait_finished()

Process based execution has indeed much higher overhead:

10 loops, best of 3: 7.56 ms per loop

All above examples were very simple – what about something more realistic – consider this task:  get some basic statistics about web servers usage.  For this task we  need to gather N random web sites, make a HEAD request to all of them and collect HTTP Server header from all responses.

Here is the solution in asyncio:

import aiohttp
import asyncio
from collections import Counter
import time

random='http://www.randomwebsite.com/cgi-bin/random.pl'
loop=asyncio.get_event_loop()
w=loop.run_until_complete


@asyncio.coroutine
def header(client, sem, url, name):
    with (yield from sem):
        with aiohttp.Timeout(60):
            resp=yield from client.head(url)
            resp.release()
            return resp.headers.get(name)

@asyncio.coroutine
def count_servers(how_many=100, max_concurrent=100):
    def filter_exc(l):
        return filter(lambda s: not isinstance(s, Exception), l)
    sem=asyncio.Semaphore(max_concurrent)
    
    with aiohttp.ClientSession() as client:
        urls=  yield from asyncio.gather(*map(lambda n: header(client, sem, random, 'location'), range(how_many)), return_exceptions=True)
        urls= filter_exc(urls)
        servers= yield from asyncio.gather(*map(lambda url: header(client, sem, url, 'server'), urls), return_exceptions=True)
        servers=filter_exc(servers)
        servers=map(lambda s: s.split('/')[0] if s else '', servers)
        return Counter(servers)

N=1000
start=time.time()
print (w(count_servers(N)).most_common(10))
print('%d sites took %fsec'%(N,time.time()-start))

And result:

[('Apache', 485), ('nginx', 152), ('Microsoft-IIS', 72), ('', 50), ('cloudflare-nginx', 45), ('GSE', 13), ('DOSarrest', 9), ('LiteSpeed', 8), ('ATS', 4), ('GitHub.com', 4)]
1000 sites took 183.702343sec

Apart of assurance that Apache still rules and some people are still using IIS (and surprise by  Cloudflare popularity), we see fairly compact, readable and powerful code thanks to asyncio.  There is one special thing to mention –  from perspective of connections handling this asyncio code  is highly parallel – so it basically tries to open all 1000 connections at once.  This can easily lead to “Too many open files” errors- as each socket represents one file handle. We can increase limit of open files per process, but better approach here is to limit number of concurrent request with semaphore.

We can rewrite that code with our Async monadic class:

from monadic import Async
from functools import partial
@asyncio.coroutine
def gather(l):
    return (yield from asyncio.gather(*l, return_exceptions=True))

def count_servers2(how_many=100, max_concurrent=100):
    def filter_exc(l):
        return filter(lambda s: not isinstance(s, Exception), l)
    sem=asyncio.Semaphore(max_concurrent)
    with aiohttp.ClientSession() as client:
        a= Async(how_many) >> range >>  partial(map,lambda n: header(client, sem, random, 'location')) >> \
        gather >> filter_exc >> partial(map,lambda url: header(client, sem, url, 'server')) >> \
        gather >> filter_exc >> partial(map, lambda s: s.split('/')[0] if s else '') >> (lambda l: Counter(l))
        return w(a.future)

N=1000
start=time.time()
print (count_servers2(N).most_common(10))
print('%d sites took %fsec'%(N,time.time()-start))

[('Apache', 502), ('nginx', 169), ('Microsoft-IIS', 81), ('', 38), ('cloudflare-nginx', 38), ('DOSarrest', 15), ('GSE', 13), ('AkamaiGHost', 5), ('Varnish', 4), ('Pepyaka', 4)]
1000 sites took 173.110303sec

Similar results, compact functional code …

Conclusions

None yet. Just impressed by asyncio and had some functional fun.

Run Multiple Terminal Tabs with Python Virtualenv

$
0
0

Virtualenv is a must have for python development.  If your project is complex beast consisting  of multiple services/components you want them see running  in different terminals  (ideally tabs of one terminal window).  Staring all terminal manually could be cumbersome. This simple script starts terminal tabs (in gnome-terminal) with activated virtual environments and eventually appropriate services/applications started:

#!/bin/bash
VENV=".venv/bin/activate"

export PYTHONPATH=~/workspace/asexor

gnome-terminal \
--tab --title "crossbar" -e "bash --rcfile $VENV -ci 'cd asexor && crossbar start'" \
--tab --title "server" -e "bash --rcfile $VENV" \
--tab --title "client" -e "bash --rcfile $VENV" \
--tab --title "terminal" -e "bash --rcfile $VENV"

None -ci argument –  interactive shell must be enforced to run command with virtual environment loaded

WAMP Is WebSocket on Steroids

$
0
0

If you look for WAMP abbreviation over Internet, you will probably find that WAMP = Windows + Apache + MySQL + PHP – which was popular web stack some time ago (but who wants to run web server on Windows today?  And other components  now also have  viable alternatives).   But in this article I’d like to talk about WAMP = Web Application Messaging Protocol.  WAMP is available  as WebSocket subprotocol, but also can work on plain TCP or Unix domain sockets.

Key difference from plain WebSocket or similar protocols is  that WAMP is routed protocol – it requires central router server to work. This enables loose coupling of components – because each component just need to connect to the central router, however the router then becomes  a single point of failure.  As per now there is no model nor implementation for multiple interconnected routers and inter-routers protocol(s), so this limits large scale implementations.

Also WAMP is not very common protocol – it has been designed and maintained by small German company Tavendo, which also maintains reference router implementation crossbar.io and client libraries for Python, Javascript, Android and C++ – autobahn. WAMP protocol is also IETF draft (but draft is expired, so question is if it makes to standard or not).

Yet for small to medium size projects, experiments with micro-services and real time communication  this protocol looks attractive and I decided to give it a try in my current project.

Main advantage of WAMP is it’s simplicity and clearly designed client libraries (at least from what I have seen in Python and Javascript). WAMP provides two basic messaging models: Publish – Subscribe and Remote Procedure Call (RPC) – both are very easy to use –  events and remote procedures are identified by generic URIs.  Just to give you idea here is definition of remote method, and publishing in Python:

class Demo(ApplicationSession):

    async def onJoin(self, details):
        def run_task(task_name, *args, **kwargs):
            log.debug(
                'Request for run task %s %s %s', task_name, args, kwargs)
            self.session.publish('my.update', task_name, status='started')


        self.register(run_task, 'my.remote.proc')

# more code then needed to run this class

and remote method call and subscription in Javascript:

var currentSession = null;

let task_updated = function (args, kwargs, details) {
    console.log('Task update', args, kwargs, details);
}

let connection = new autobahn.Connection({
    url: 'ws://127.0.0.1:8880/ws',
    realm: 'realm1'
});

connection.onopen = function (session) {
    console.log('Connection opened', session);
    session.subscribe('eu.zderadicka.asexor.task_update', task_updated);
    currentSession=session
};

//Somewhere later in code - 

currentSession.call('my.remote.proc', ['dummy task', 'arg'], {'other_arg': 'value'}).then(
      function(res) {
        console.log('Task result is'+ res);
});

Messages  in WAMP are based on JSON format –  so basically anything that is JSON serializable could be an argument or result of remote procedure or content of published event. Internally WAMP can leverage more efficient data serialization like MessagePack, UBJSON or CBOR. (serializers are basically pluggable into protocol).

As WAMP is intended to be used  on both private and public networks security is indeed an important part of the protocol.   It can leverage SSL/TSL channel encryption for both Websocket or raw socket and the protocol itself offers authentication ( token, challenge-response, Websocket based …) and authorization. Authorization allows to granularly define who can call, register procedure or publish, subscribe event based on procedure/event URI and user authentication credentials.

In my use-case I required clients (browser) to be able to submit various potentially long running tasks to server and receive instant updates about tasks progress and final results. Here is the solution architecture:

wamp

Idea is to extend regular Single Page Application  (browser client communicating with RESTful API server) with WAMP real time communication for specific tasks (conversion of ebooks).  Clients can easily submit requests for long running task via RPC and subscribe to updates via WAMP publish-subscribe model.

So we need server side component to schedule and launch tasks (conversion programs) in separate processes. It also talks WAMP and implements RPC to schedule task and publishes tasks updates.  This component is implemented in Python with autobahn library.   Autobahn library enforces asynchronous programming style using either twisted or asyncio.  I choose asyncio, because
a) it’s now part of python standard libraries (and new async keywords  in 3.5 are really cool) and
b) I think it cleaner and easier to use that twisted (I never liked Twisted library very much –  it always seems to me, how to say it,  ehmm “twisted”).

Crossbar.io is written in twisted and can run twisted server components within same process.  However asyncio components need to run in separate process and connect to the router via WAMP.  For server side I would prefer some efficient communication – ideally unix domain socket, (Websocket overhead here would be useless). Small problem was that autobahn library did not have WAMP raw socket support for asyncio.  Fortunately it was not so difficult to add it – so I added it via this pull request.

The proof of concept tasks scheduler/manager called ASEXOR (ASynchronous  EXecutOP) is available here on github.

But WAMP has many other applications – look for instance at this example of simple system real time monitoring solution (with Django frontend).  Or look at these demos. Or IoT Cookbook.

Conclusion

WAMP is a nice, simple protocol, which could be used for real time communication in many different scenarios.  It’s very  easy to start to play with it (especially in Python and Javascript) and could be quickly plugged into existing web application.  Or new inventive applications can be created around this protocol.

My only worry for now would be scalability of WAMP solution in massive deployment.

Next Adventure in Aurelia – Autocomplete Component

$
0
0

As I have written in this post I’m slowly getting into Aurelia Web UI framework. Recently I needed an autocomplete component.  My requirements were:

  • get suggestions from server via REST API (JSON payload)
  • simple, yet flexible (value can be calculated from received suggestions)
  • flexible ways to display suggestions (ideally provide a template to display suggestions values)
  • suggest values as one types matching starting letters (case insensitive and diacritics insensitive)
  • cache server responses for efficiency
  • can use both mouse and keys (arrows + enter) to select suggestion

I’m sure that existing autocomplete components like typeahead or JQuery UI Autocomplete would serve my purpose quite well. It’s fairly easy to integrate existing components from other frameworks into Aurelia (see this post for instance).  But I decided to create my own, using only Aurelia (and a bit of JQuery – but it can be easily rewritten in pure DOM API – JQuery is used just for convenience, because it’s anyhow  used in Aurelia skeleton app). I though it would be nice learning exercise (and it really was) and also we programmers (especially leisure programmers like myself) do like to reinvent the wheel, right? (But it’s not always bad idea – image world when only one type of wheel exists – by recreating existing solutions, improving them, changing them we can also achieve progress – Web UI frameworks themselves are good example of such progress).  I’d like to share my experiences further in this article.

Coding And Learning

I’ll not show all the code here – sources are available here at github, as part of my other project.

So let’s start with component’s view ( template) autocomplete.html:

<template>
  <require from="./autocomplete.css"></require>
  <div class="autocomplete-container">
    <input class="autocomplete-input" autocomplete="off" value.bind="value & debounce:850" blur.trigger="hideSuggestions()" keydown.delegate="keyPressed($event)">
    <div class="autocomplete-suggestion" style="display:none">
      <div class="list-group">
        <a data-index="${$index}" class="list-group-item ${$index == _selected ? 'active' : ''}" repeat.for="item of _suggestions" mousedown.delegate="itemSelected($event)">
          <span if.bind="! suggestionTemplate">${item}</span>
          <compose if.bind="suggestionTemplate" view.bind="suggestionTemplate" view-model.bind="item"></compose>
        </a>
      </div>
    </div>
  </div>
</template>

Aurelia is all about data bindings, right? So we use it here intensively  to implement autocomplete functionality. There are two important bindings:

value.bind="value & debounce:850" – on line 4 – this will assure that changes in the text input are propagated into our view-model and  we also use ‘binding behaviour’ –  debounce:850, which assures that value is updated only after it stays same for 850ms (e.g. we’ve paused writing), and it’s exactly what we want for autocomplete. In view model we process these changes in valueChanged method and fetch appropriate suggestions. This binding is by default two-way.

repeat.for="item of _suggestions" – on line 7 – this is one way binding that is updated as new suggestions are loaded in view-model.

We need also some event bindings to enable us to select a suggestion:

keydown.delegate="keyPressed($event)" – on line 4 – binds a method to handle special keys for selecting suggestions (up, down, enter, escape).  It worth to note that by default such method prevents default handling of the event unless it returns true. In this case it’s crucial to enable default handling, otherwise we could not write into this input.

mousedown.delegate="itemSelected($event)" – on line 7 – enables us to select given suggestion with mouse click. To identify individual suggestion we use custom data attribute:  data-index="${$index}" ($index is bound to index of repeat.for iterator).

Other bindings on lines 8 and 9 are used to display suggestion – either as plain string (line 8), when no template is provided. Or we can use custom template with help of compose tag.  if.bind is used to decide, which one to use. For custom template we had to provide model-view property containing template path: view.bind="suggestionTemplate". View-model here is bound to individual suggestion objects from iterator in parent element (item).
Here is an example of simple template for a suggestion:

<template>
  ${title} (${id})
</template>

Only remaining binding is on line 4 – blur.trigger="hideSuggestions()". It hides suggestions, when text input loses focus (user click somewhere else on the page).  Actually implementing this binding was bit challenging, because it interferes with mouse action on line 7. The only working combination was blur.trigger binding here and mousedown event on line 7 (not click event).

We  also need some styling for our autocomplete  component (absolute position for suggestions list), which is contained in file autocomplete.css required on line 2.

Next we have to implement view-model for our template – autocomplete.js. The basic skeleton of view-model class is:

import {bindable, inject} from 'aurelia-framework';
//other imports

@inject(Element)
export class Autocomplete {
  @bindable({defaultBindingMode: bindingMode.twoWay}) value; // value of input
  @bindable loader;
  // more properties ...
  _suggestions;
 
  constructor(elem) {
    this.elem = elem;
  }

  valueChanged() {
    // load suggestions for current value calls getSuggestions
  }

  getSuggestions(forValue) {
  // logic to fetch suggestions for server
  }

  attached() {
    this.suggestionsList = $('div.autocomplete-suggestion', this.elem)
  }

  hideSuggestions() {
    this.suggestionsList.hide();
  }

  showSuggestions() {
    this.suggestionsList.show();
  }
}

First we use dependency injection of Aurelia framework to make root element of the component available in our model-view class ( @inject decorator on line 4, constructor lines 11-12 and assignment in attached method on line 24). This is very common patter for Aurelia components – key insight here is that we can work with view elements only after they are attached to page DOM (signalized by attached method).

Core logic of our autocomplete component is implementedin getSuggestions method:

getSuggestions(forValue) {
    logger.debug(`Get suggestions for ${forValue}`);
    if (Array.isArray(this.loader)) {
      return Promise.resolve(this.loader.filter(item =>
        startsWith(this.getSuggestionValue(item), forValue)));
    } else if (typeof this.loader === 'function') {
      if (this._cache && startsWith(forValue, this._cache.search) &&
        new Date() - this._cache.ts <= CACHE_DURATION) {
        return Promise.resolve(this._cache.items.filter(
          item => startsWith(this.getSuggestionValue(item), forValue)
        ))
      }
      return this.loader(forValue)
        .then(res => {

          if (res.items.length === res.total) {
            // we have all results, can cache
            this._cache = {
              search: forValue,
              items: res.items,
              ts: new Date()
            }
          }

          // if inputed value already changed do not return these suggestions
          if (this.value !== forValue) return [];

          return res.items;
        });
    }
    return Promise.reject(new Error('Invalid loader'));
  }

Here we use class  bindable property loader to get appropriate suggestions – for testing purposes it can be  just plain array of all available suggestions (ordered appropriately). Then we need to filter them with current autocomplete value (lines 3-5) and return matching suggestions as resolved Promise (to keep it consisted with asynchronous fetch of suggestions from server). Filtering is done by matching start of the suggestions values ( case and diacritics insensitive):

function startsWith(string, start) {
  string = diacritic.clean(string).toLowerCase();
  start = diacritic.clean(start).toLowerCase()
  return string.startsWith(start);
}

More interesting behaviour happens when loader is a function. This function should return a Promise that resolves to  an object with suggestions (items property contains suggestions, total property contains total number of suggestions available on the server).  If we receive all suggestions from server for given search key (length of items less or equal then total), we can cache them and use later (lines 16-23). Cashing strategy is simple –  if current value of autocomplete starts with search value of cached response, we can use current cache and just filter it locally (lines 7-11). Crucial is that local filtering works exactly same way as on the server. We also limit time validity of cache to certain period (60 seconds).

This simple strategy  works fine in most cases,  because people are writing sequentially, so in some moment we’ve got in cache all suggestions needed for all following strings with this prefix and can filter suggestions locally in client. Just stick to KISS (Keep It Simple Stupid) approach here.

So basically that’s the core of our view model – for complete implementation check full code in autocomplete.js.

Now we can use our component in the page:

<template>
  <require from="components/autocomplete/autocomplete"></require>
  <h3> Ebooks (loader is fetching values from API)</h3>
  <autocomplete loader.bind="loaderEbooks" value-key="title" suggestion-template="./autocomplete-ebooks.html" value.bind="ebook"></autocomplete>
  <p>Selected ebook is ${ebook}</p>
</template>

with this view-model:

import {inject} from 'aurelia-framework';
import {ApiClient} from 'lib/api-client';

@inject(ApiClient)
export class TestPage {
  ebook;
  
  constructor(client) {
    this.client=client;
  }

  get loaderEbooks() {
    return start => this.client.getIndex('ebooks', start);
  }
}

Small note about loaderEbooks property – why not to have method :

loadEbooks() {
    return this.client.getIndex('ebooks', start);
  }

and bind it directly in loader.bind attribute? Actually it will not work due to the way how Javascript uses this reference. If a function is called as an object method, then this refers to the object from which method is called. It’s an instance of Autocomplete view-model class, not our page view-model, because function reference is bound to Autocomplete loader property and then called in getSuggestions method like this.loader(forValue) (see above – line 13).

We also use custom template for suggestions –  autocomplete-ebooks.html:

<template>
  <require from="components/authors"></require>
  <div class="ebook-title">${title}</div>
  <div class="ebook-series" if.bind="series">${series.title} #${series_index}</div>
  <authors authors.one-time="authors" compact.bind="true" linked.bind="false"></authors>
</template>

So finally our autocomplete component may look like this:

autocomplete

 Conclusions

Thanks to Aurelia bindings, binding behaviours, composing and templates I was able to put together a fully functional and flexible autocomplete component in approximately 200 lines of code (including templates). That’s pretty impressive, huh? (compare with source code for typeahead). The component might need some tweaking in future, but basics are there.

I’m continuing to learn Aurelia, I’m fairly happy with it, although is some areas my intuition failed me and have to struggle with the framework a bit. I’m sorely missing more detailed documentation of Aurelia, especially in depth explanation of it’s key concepts. Also fighting little with  required tool set – especially package manager JSPM (several packages have issues like aurelia-configuration, aurelia-bundler, autobahn). But overall I’m progressing and hoping to learn more about Aurelia (now available as RC).


Revival of Neural Networks

$
0
0

My actual master studies topic was AI (more then 20 years ago).   Artificial Neural Networks (ANNs) were already known and popular branch of AI and we had some introduction to basics of artificial neural networks (like perceptron, back propagation, etc.). Though it was  quite interesting topic, I had not seen many practical applications in those days.  Recently  I’ve chatted with old friend of mine,  who stayed in university and is involved in computer vision research, about recent advancements in AI and computer vision and he told me that most notable change in last years was that neural networks are being now used in large scale. Mainly due to increase in computing power neural networks now can are applied to many real world problems. Another hint about popularity of neural networks came from my former boss, who shared with me this interesting article –  about privacy issues related to machine learning. I’ve been looking around for a while and it looks like neural networks are becoming quite popular recently – especially architectures with many layers used in so called deep learning. In this article I’d like to share my initial experiences with TensorFlow, open source library (created by Google), which can be used to build modern, multi-layered neural networks.

I followed their advanced tutorial for handwritten digits recognition (grey picture  28×28 pixels,  MNIST  dataset of 55 000 pictures) – classical introduction problem in this area .  I implemented it  according to the tutorial (with few modifications, mainly to enable me to play with ANN parameters) in Python3 in Jupyter notebook, which is available here on gist.

The architecture of this neural network is on the following picture (It’s not exact – just my visualization how it works):

neural-net

Input layer is representation of the scanned digit image –  it’s 28×28 grey scale picture (normalized to values between 0 – 1).

First layer is a Convolutional layer, in traditional ANN each neuron is connected to every output from previous layer. However in the convolutional layer neuron is connected only to certain window  from previous layer (in our case 5×5 rectangular window).   This window moves through the picture ( by 1 pixel in horizontal or vertical dimensions) and have same parameters for all its positions (thus representing 2D convolution). Convolutional layers are inspired by organization of human visual cortex in our brains and have several advantages. Firstly as the window is local only this layer recognizes and generalizes local features in the image, which can be then used in further processing. Secondly it reduces significantly number of parameters needed to describe the layer, thus allowing to process bigger pictures.
Convolutional layer is combined with Max-Pool layer, which aggregates values from a window (2×2 in our) taking just maximum value within that window for each feature. Window moves by step of 2 pixels – thus resulting data size is reduced by factor of 4 ( by 2 in each dimension) – this is visualized by red pyramids in the picture above.

Second layer is also convolutional layer.  It works with ‘features’ extracted in first layer and thus representing more ‘abstract’ or ‘higher level’ features in the image.

Third layer is fully connected to previous layer (e.g. more classical ANN layer)  and represents (in my view)  knowledge how to recognize handwritten digits based on local features detected in previous layers. This knowledge is stored in parameters of 1024 neurons in this layer.

Output layer has 10 neurons, each representing one digit. The layer is using softmax function, so output can be interpreted as probability distribution function (sum of all outputs is 1). Neuron with highest value represent predicted number and it’s output value probability of such result..

This ANN is also using dropout during learning –  about half of neural connections are switched off (weight set to 0) randomly at each learning step. Dropout helps to prevent overfitting (network recognizes perfectly training set, but performs poorly on other data, it’s not trained to generalize).

The test according to tutorial code run well –   training of network took more then 1 hour on my notebook (dual core Intel Core i5  @2.7GHz, 16GB memory) and resulting accuracy on test set was 99.22%, which is result advertised in the tutorial.  Mostly misclassified digits were 4, 6 and 9 and on the other hand mostly correctly recognized digits were 1, 3, 2.

I decided to play a bit with this ANN parameters to see how they influence it’s accuracy:

1st Layer size 2nd Layer size Conv.window size 3rd Layer Size Accuracy
32 64 5×5 1024 99.22%
16 32 5×5 512 99.12%
64 128 5×5 2048 9.8%
64 32 5×5 1024 99.12%
32 64 4×4 1024 99.25%

First result is the reference one, based on parameters from tutorial.  If we reduce number of neurons to half in all 3 hidden layers, accuracy drops just by 0.1%.   Same if we switch sizes of first and second convolutional layers. Some results look contra-intuitive at first look – if we double size of all 3 hidden layers, suddenly networks is performing very poorly – accuracy 9.8% – actually network recognizes correctly just zeros (one would expect that more neurons will make network ‘smarter’). Possible explanation is that now network is just too big for given training data set – it does not contain enough information for network to learn (I also tried to increase size of one learning step from 50 to 200 samples, but it did not help). We can identify this problem even during learning stage, where we can see that accuracy is not improving during learning – in previous cases, accuracy quickly increased to over 90%, in this case it stays around 10% for all learning steps.

By reducing convolution window size to 4×4 we can achieve even slightly better results ( by 0.03%) then recommended parameters from tutorial.

Experiments with this network confirmed to me what I already remember about neural networks – they can be fairly tricky –  without in depth knowledge it’s hard to set optimal parameters and frequently network does not learn as expected.  My friend from university confirmed me that often it’s kind of ‘black magic’ to design right neural network for given problem.

Also interpreting knowledge hidden in a neural network and understanding why networks provided particular result can be fairly complex task or even not possible at all.  Consider following picture, which shows 9s misclassified by our network (configured with the last set of parameters and achieving 99.25% accuracy):
nines

Clearly we as humans would match some of these 9 correctly (first row second and third) and it’s hard to argue why our network decided otherwise.

Conclusions

Neural networks have seen huge renaissance in past few years.  Neural networks are now being used in production in many areas (image recognition/classification – Facebook passes billions of images daily to it’s ANNs , speech recognition – Google uses ANN for it’s Voice services , data classification …)  and are able to achieve better results that traditional machine learning algorithms. Main progress here can be contributed to advancement in hardware performance,  but also to new neural network techniques, especially focused on effective learning.  Neural networks with many hidden layers (deep networks) are now technically possible.

In this article I’ve played with one of available neural network libraries TensorFlow according to it’s instructional tutorial. Even this tutorial small was very  enlightening and showed me the  progress in this area. However key issues of neural networks, as I remember them from past, still remains to some extent –  problematic/complex choice of network layouts and parameters and difficult task of how to interpret knowledge stored in the network (or understand why network behaves in particular way).

But for sure current neural networks libraries provide many possibilities and there are many opportunities how to explore them. I’ll try to learn bit more and leverage them in some future projects.

Asyncio Proxy for Blocking Functions

$
0
0

File operations and other IO operations can block asyncio loop and  unfortunately  python does not support true asynchronous disk operations (mainly due to problematic state of async disk IO in underlying os – aka linux – special library is need for true asynchronous disk operations  so normally select (or other IO event library) always reports file as ready to read and write and thus file IO operations block). Current solution is to run such operations in thread pool executor. There is asyncio wrapper library for file object – aiofiles, but there are also many blocking functions in other python modules – like os, shutil etc.  We can easily write wrappers for such methods, but it can be annoying and time consuming if we use many of such methods.   What about to write a generic proxy, which will assure that methods are executed in thread pool and use this proxy for all potentially blocking methods within the module.

The proxy itself can be fairly simple:

class AsyncProxy(object):
    def __init__(self, module, loop=None, executor = None):
        self._module = module
        self._loop = loop or asyncio.get_event_loop()
        self._executor = executor
        
    def __getattr__(self, name):
        function = getattr(self._module, name)
        if isinstance(function, ModuleType):
            return AsyncProxy(function)
        @wraps(function)
        async def _inner(*args,**kwargs):
            loop = kwargs.pop['loop'] if 'loop' in kwargs else self._loop 
            executor = kwargs['executor'] if 'executor' in kwargs else self._executor
            f = partial(function, *args, **kwargs)
            return await loop.run_in_executor(executor, f)
        return _inner

We can use our proxy for os module like this: aos = AsyncProxy(os)

And we can test it with stat method for instance:

%timeit loop.run_until_complete(aos.stat('/etc/passwd'))
1000 loops, best of 3: 444 µs per loop

How does speed compare with regular call to os.stat:

%timeit os.stat('/etc/passwd')
The slowest run took 20.03 times longer than the fastest. This could mean that an intermediate result is being cached.
1000000 loops, best of 3: 1.69 µs per loop

Clearly there is an overhead for running this operation in thread pool (and some small overhead from another level of indirection in proxy) so it’s up to implementator to consider if 30 microseconds operation should be considered as blocking  (that’s worth case in our test, but what if disk will be really slow, possibly spin-down? That’s the problem with most of blocking IO operations – we cannot assume how much they will really take).  However with our approach one can easily change how function is call as blocking or non-blocking – by using os or aos prefix.


NetworkManager Script to Set HTTP Proxy

$
0
0

While Gnome and it’s derivatives support automatic proxy detection,  it do not work well for all programs, particularly for command line programs.   I’ve found  that using simple script in /etc/NetworkManager/dispatcher.d works better for me, which sets and unsets fixed proxy works better.   NM dispatcher scripts are run each time network connections change (network up, down, VPN connect etc.) and received two parameters ( interface name and status) and bunch of environment variables.

This script is useful for exploring how NM dispatcher scripts are called:

#!/bin/bash
LOG_FILE=/tmp/nmlog.txt
if [[ ! -f $LOG_FILE ]]; then exit 0; fi

echo ------`date`------ >> $LOG_FILE
echo Running as `whoami` >> $LOG_FILE
echo PARAMS $1 $2 >> $LOG_FILE 
env >> $LOG_FILE

For proxy activation and deactivation we first need to set it up in Network preferences as manual proxy (or you can use dconf_editor – which enables to setup also URLs to bypass proxy – look under key system/proxy).  To activate or deactivate proxy we can later just switch between manual and none proxy modes (which we can  do easily with gsettings command).

Here is final script:

#!/bin/bash

VPN_DEV=vpn0
OFFICE_IP_PREFIX='^10\.163\.1'
USER=`users|awk '{print $1}'` #on normal desktop usually only one user is logged
USER_ID=`id -u $USER`
ETHER_DEV=`nmcli d| grep ethernet| awk '{print $1; exit}'`
export $(strings /proc/$(pgrep -U $USER_ID gnome-session | head -n 1)/environ | grep DBUS)

set_proxy () {
[[ -z "$1" ]] && MODE="none" MSG="Proxy Unset" || MODE="manual" MSG="Proxy Set"

sudo -u $USER -E gsettings set org.gnome.system.proxy mode $MODE
sudo -u $USER -E  notify-send -t 2000 -i network-wired-disconnected $MSG

}

up_down () {
	if [[ $1 == "up" ]]; then
		set_proxy 1
	elif [[ $1 == "down" ]]; then
		set_proxy
	 fi
}

if [[ $1 == $VPN_DEV ]]; then
	up_down $2
elif [[ $1 == $ETHER_DEV  ]]; then 
	if [[  $2 == "up" || $2 == "dhcp4-change" ]]  && [[ $IP4_ADDRESS_0 =~ $OFFICE_IP_PREFIX ]]; then
		set_proxy 1
	elif [[ $2 == "down" ]]; then
		set_proxy
	 fi
fi

Some gotchas:

  • Scripts must have proper permissions,   NetworkManager runs only executable scripts and ignores scripts with too permissive access ( write for others)
  • Script runs under root, but gsettings and send-notify should be run under your user account and they also need current desktop dbus address (DBUS env.variable in your desktop session)
  • in case of DHCP ‘up’ status is often not enough – interface can be up, but yet not received IP address from DHCP server, we should look also for dhcp4-change status
  • Skype does not handle change of proxy (from manual to none and vice versa), this function could be used to restart skype (not yet fully reliable):
    restart_skype() {
    sudo -u $USER bash -c "export $(strings /proc/$(pgrep -U $USER_ID gnome-session | head -n 1)/environ|xargs); pkill skype; sleep 5; skype &"
    }


Mybookshelf2 Alpha Version is available

$
0
0

Mybookshelf2 enters the stage, when code can be considered of alpha quality.  Basic functionality is there, so it could be tried and I plan to move my ebooks collection to it soon.  MBS2 is packed with new technologies and comparing to previous version (Mybookshelf) it can be considered a completely new application.

So what’s new?  Concerning functionality not much,  but a lot happened internally. For me it’s more about testing and playing with new technologies then managing ebooks (which is still important of course).  Maybe some of currently used technologies are bit of overkill (like using WAMP protocol), but nevertheless they play important part in the application.

All server side  code is written in Python, for this project I decided to use Python 3.5 without backwards compatibility. Python 3.5 is stable enough now and it’s syntax extensions for asyncio (which are used in the project) are really nice. Front end is using Aurelia Javascript framework, which is leveraging  latest JS achievements (ECMAScript 2016).

Below is block schema of Mybookshelf2 application:
mbs2

Although the application looks bit complex to deploy you can easily try it with Docker,   docker scripts are available with application source code on github.

You can also check its page on this web short demo video.

Easy SQL Schema Migration for SqlAlchemy and Flask

$
0
0

While SqlAlchemy (and Flask-SqlAlchemy) provides an easy way to create DB schema from scratch,  migration of an existing schema is bit more challenging. As soon as you change attributes  in your declarative ORM models, the underlying DB schema is to be changed for application to work.   If you need to keep data , you’ll need to modify DB schema with some DDL commands (ALTER TABLE …)  and this functionality is not part of SqlAlchemy nor Flask-SqlAlchemy.

Usually this task is fairly manual,  but several tools exist to help you with it. Probably most sophisticated tool is Alembic and its Flask wrapper flask-Migrate. While Alembic advertise itself as “a lightweight database migration tool”, there is still a lot of manual  work to be done.  This additional effort is then rewarded with advanced features like downgrading, cross database compatibility, branching etc.

However if you need something simpler with just one database product in mind (PostgreSQL) and  forward  migration only, Alembic can be an overkill (especially requirement to learn custom scripting to modify DB).

So if we stick to PostgreSQL, we can use other tools to compare different database instances and generate migration SQL DDL scripts for us.   I’ve found this tool apgdiff very usefull. It’s written in Java and can compare two database dumps ( from pg_dump tool) and create differential DDL script. We just need two databases, one with the old and other with the new schema.   But is you are running tests,  you should already have another database for testing, which is upgraded to new schema as you are running tests after SqlAlchemy declarative models changes.

So my generic approach to DB schema migration is following:

  1. Add table to hold current version of schema in database (declarative model):
    class Version(Base):
        version = Column(Integer)
  2. Add required version of DB schema into Python source code:
    __db_version__ = 1
  3. Modify declarative models, run tests and create diff script with apgdiff, name it as SQL_DIR/migration/vX.sql, where X is the next version of DB schema. Add this script to version control. Increase __db_version__ in code.
  4. Create a migration task – it basically runs all scripts with version bigger then schema version stored in database and smaller or equal then version required by the code.  Scripts run in order of increasing db versions.  Here is migration task written for flask-script:
    @manager.command
    def migrate_tables():
        print('This will migrate database to latest schema, you are advised to backup database before running this command')
        if prompt_bool('Do you want to continue?'):
            mdir = os.path.join(SQL_DIR, 'migration')
            try:
                versions=model.Version.query.all()
            except ProgrammingError:
                old_version = 0
            else:
                if len(versions)>1 or len(versions)<1:
                    raise Exception('Invalid version information in DB')
                old_version = versions[0].version
            if old_version == __db_version__:
                print('DB is at correct version %d'% old_version)
                return
            scripts = []
            for script in os.listdir(mdir):
                m=re.match(r'v(\d+)\.sql', script)
                if m:
                    version = int(m.group(1))
                    if version <= __db_version__ and version > old_version:
                        scripts.append((version, os.path.join(mdir,script)))
                        
            scripts.sort()
            connection = db.engine.raw_connection()
            try:
                c = connection.cursor()
                for v,fname in scripts:
                    script = open(fname, 'rt', encoding='utf-8-sig').read()
                    print('Upgrading database to version %d'% v)
                    res = c.execute(script)
                    connection.commit()
            finally:
                connection.close()
  5. Checkout code into desired environment (stage, production, …)  and run the migration task there.

After this infrastructure in set-up in your code you just need to run items 3 and 5 in next migrations.

Lessons Learned From Current Web Application Development

$
0
0

Mybookshelf2 (MBS2) is basically in beta stage and provides all functionality available in previous version and more. As I went through programing the new application using several new technologies,  I’ve realized few things, which I’d like to share here.

Web client development’s got quite complex

It’s not enough now to know a bit of Javascript and few libraries (aka jQuery) to create compelling web font end. With rise of Single Page Applications (SPA) and dominance of elaborate JS UI frameworks like Angular, Aurelia, React, … web front end development is getting pretty complex and happily competes with complexity of server side development. One of key factors that contribute to this change is a tool stack needed for current JS front end development. Let me demonstrate this on the tool stack I had to learn for my  Aurelia framework based front end development:

  • NodeJS – to run all required tools
  • NPM – to install tools and required packages
  • Babel transpiler( compiler that compiles JS to JS)  to compile next generation JS (or TypeScript)  into ES5 code understandable  by current and legacy browsers
  • Gulp – a build tool
  • BrowserSync – to run and test front end application
  • JSPM – to package the code for the web browsers and load modules in the web browsers
  • Karma and Jamine – to run tests

All above was basically needed to to build, test and run my code. On top of that you indeed need UI framework itself and numerous other libraries (like above mentioned jQuery, which is far from being obsolete by new frameworks).  I also found that good knowledge of developer tools in browser (Firefox and Chrome) is essential.

Aurelia framework has done good job to hide this tool chain complexity from me,  but nevertheless as my project evolved I had to cope directly with some of these tools anyhow (browser packing and JSPM especially gave me quite hard time –  I actually made a round trip from JSPM to bare SystemJS, then to WebPack, to finally return back to JSPM, which turned out to be best solution for me after all) .

By no means I’d  like to make impression that these tools are not good.  Actually they all are pretty good (some of them are truly impressive, for instance BrowserSync, which saved me a lot of time during development). But still all these new tools were additional things I had to learn to be able to develop modern web applications.

Quantum leap in Javascript

ECMAScript 6 ( abbreviated as ES6 or  ES 20015)  is a great progress in Javascript!   It’s loaded with tons of new features, both in syntax and functionality of build-in JS objects.  It’s so much better then previous versions,  so finally I did start to like Javascript.  Now finally it is getting on pair with Python concerning the expressiveness of the language.

As a part of this project I had to learn ES6 and since there are some many changes I’d recommend to read a book about it. I have found this free book quite good.

Is ORM needed for implementation of RESTful API?

On server side MBS2 application is mainly a kind of RESTful API implementation, which is then used by rich SPA JS client. I implemented  it pretty conservatively using Flask-RESTful, SQLAlchemy and Flask-SQLAlchemy. SQLAlchemy is pretty impressive package, very powerful (much more then Django ORM), but also quite complex and it took me some time to learn it.  And as I was progressing through server API implementation a heretic thought pop up –  Why I need all that ORM (Object Relational Mapping) thingy in my API functions. Of course it’s very convenient, but as for advanced functionality of ORM layer like sessions, unit of work, caching etc. I had a little use for it.  Usually it was just about grabbing an object or lists of objects and sending  them out ( or insert, update, delete of single object).  Sometimes even advanced ORM functionality stood in the way of correct implementation ( auto-flushing of object to database too early).

It would be probably OK  if there were no additional consequences of using ORM, however as I’ve shown  in this article,  ORM means significant drop in performace – ORM queries are several times slower (5x- 10x) then direct access using SQL. It’s understandable, considering complex machinery under the hood, but in case of RESTful API, where we are almost not using it, it looks like quite a waste. Actually more compelling problem for me with RESTful API for me was serialization and deserialization of data, where ORM did helped only little (in case of nested objects).

So if ORM is superfluous (in my opinion), what else we can use.   My proposal would be to use custom DAL (Data Access Layer),  using SQL directly in DBAPI driver  (or through excellent  SQLAlchemy SQL Expressions Language, which makes construction of SQL statements more general and pythonic). Writing DAL could be bit boring,   but in the end probably not much more time consuming then using ORM (considering simple scenarios I have for RESTful API).

I’ve already done something similar for another part of the application – back-end ebooks processing engine, which is responsible for ebooks conversions and metadata extractions.  As this program is written as completely asynchronous (with asyncio), there is no possibility to use ORM, only core SQLAlchemy for SQL construction. DAL layer is also asynchronous (using aiopg) and generally works fine.

Actually what I did missed in my project was a good comprehensive library for data management on client side – in the browser. I very quickly looked at BreezeJS, which looks interesting. So on my next project I might try  different approach – very simplistic RESTful API (possibly auto-generated from database schema) and some advanced client side data library like Breeze, because now everything happens in the client anyhow.

WAMP and Crossbar.io usage was an overkill for such application

I have written about WAMP protocol in this article.  In MBS2 it’s used to send requests to backend processing engine and monitor progress of such tasks.   This functionality is implemented in separate package ASEXOR.  I have no particular complains about Crossbar.io and used libraries, they work great and they are mature and reliable, however considering the simplistic needs of the application ( call one remote function and subscribe to one updates source)  using full WAMP stack is just an overkill. Looking at it now I think more simple communication using WebSocket directly and some simple aiohttp server would be more appropriate.  But I have to admit using WAMP and Crossbar.io was a good learning exercise ( as I needed to implement new transport (asyncio WAMP over rawsocket) into autobahn WAMP library).

Python becoming irrelevant as server platform for web applications

Do not take me wrong,  I do love Python. It’s a great language, with many applications in many areas, web development being just one of them (as for others, probably more prominent,  I can mention scientific computing and system tools).  However as I looked around during application development I think python is loosing slightly in area of web development.  I have already written about myself leaving Django behind, but generally I think more interesting and progressive  things are now happening outside Python, especially in NodeJS community (if we look within scripting languages  universe, outside of this universe of course a lot of interesting things is happening in Java, Scala, Go etc).  Javascript with  ES6 version became quite nice language and having one language for client and server is indeed a significant benefit. But what attracts me more are interesting projects like Loopback (recently acquired by IBM) , Feathers and others similar, which promise quick path to scalable and flexible API server.

Comparison of JSON Like Serializations – JSON vs UBJSON vs MessagePack vs CBOR

$
0
0

Recently I’ve been working on some extensions to ASEXOR, adding there direct support for messaging via WebSocket and I use JSON for small messages that travels between client (browser or standalone)  and backend.  Messages looks like these:

messages = [
    {'call_id': 1, 'kwargs': {}, 'args': ['sleep', 0.1]},
    {'call_id': 1, 't': 'r', 'returned': 'd53b2823d35b471282ab5c8b6c2e4685'},
    {'call_id': 2, 'kwargs': {'utc': True}, 'args': ['date', '%d-%m-%Y %H:%M %Z']},
    {'call_id': 2, 't': 'r', 'returned': '77da239342e240a0a3078d50019a20a0'},
    {'call_id': 1, 'data': {'status': 'started', 'task_id': 'd53b2823d35b471282ab5c8b6c2e4685'}, 't': 'm'},
    {'call_id': 2, 'data': {'status': 'started', 'task_id': '77da239342e240a0a3078d50019a20a0'}, 't': 'm'},
    {'call_id': 1, 'data': {'status': 'success', 'task_id': 'd53b2823d35b471282ab5c8b6c2e4685', 'result': None, 'duration': 0.12562298774719238}, 't': 'm'},
    {'call_id': 2, 'data': {'status': 'success', 'task_id': '77da239342e240a0a3078d50019a20a0', 'result': '27-02-2017 11:46 UTC', 'duration': 0.04673957824707031}, 't': 'm'}
    
]

I wondered, if choosing different serialization format(s) (similar to JSON, but binary) could bring more efficiency into the application –  considering  both message size and encoding/decoding processing time.  I run small tests  in python (see tests here on gist) with few established serializers, which can be used as quick replacement for JSON and below are results:

Format Total messages size (bytes) Processing time – 10000 x encoding/decoding all messages
JSON (standard library) 798 833 ms
JSON (ujson) 798 193 ms
MessagePack (official lib) 591 289 ms
MessagePack (umsgpack) 585 3.15 s
CBOR 585 163 ms
UBJSON 668 2.28 s

As messaging can use clients in web browser we can also look at performace  of some serializers in Javascript on this page.  As JSON serialization in part of browsers Web API, unsurprisingly it’s fastest there.

In Python pure Python libraries (UBJSON, MessagePack with umsgpack package) are slowest ( but their performance might get better in PyPy).  Standard library implementation of JSON serializer can be easily replaced by better performing ujson package.

Conclusions

JSON is today really ubiquitous, thanks to it’s ease of use and readability.  It’s probably good choice for many usage scenarios and luckily JSON serializers show good performance.   If size of messages is of some concern, CBOR looks like great, almost  instant replacement for JSON, with similar performance in Python ( slower performance in browser is not big issues as browser will process typically only few messages)  and 27% smaller messages size.

If size of messages is big concern carefully designed binary protocol ( with Protocol Buffers for instance) can provide much smaller messages ( but with additional costs in development).

Run and monitor tasks via WebSocket with ASEXOR

$
0
0

Many modern web applications require more then just displaying data in the browser.  Data may need to be processed and transformed in various ways, which require intensive processing tasks on server side. Such processing is best done asynchronously outside of web application server, as such tasks can be relatively  long running. There are already many existing solutions for asynchronous task scheduling, some of them are quite sophisticated general frameworks like Celery, Kafka, others are build in features of application servers ( like mules and spoolers in uWSGI).  But what if we need something simpler, which can work  directly with Javascript clients and is super simple to use in a project.  Meet asexor – ASynchronous EXecuOR,  a small project of mime.

Asexor was initially created as supporting project for Mybookshelf2,  but recently I refactored it and extended it to make it more general. Asexor is written in Python  leveraging heavily asyncio module. The key function of Asexor is to run tasks in separate processes and for this purpose it contains three main parts:

Tasks – tasks are defined as simple Python wrapper around  program to be executed – just to validate and prepare command line arguments and parsing results returned by the program.  The is a special kind of task – MultiTask – that can generate and schedule other new tasks.

Scheduler – schedules tasks using priority queue, executes them concurrently assuring  that number of tasks running  in parallel is limited ( to defined value). Scheduler also contains authentication (based on user tokens) and authorization functions, assuring that only authorized users can run tasks.

Protocols – communication protocols to submit a task and receive feedback about task status (scheduled, started, finished, error …). The primary focus in Asexor was to WebSocket protocol – so tasks can be easily controlled directly from web Javascript client. However additional protocols are available for more flexibility (HTTP long poll, raw socket TCP protocol, WAMP), so tasks can be scheduled efficiently also from backend components.

Below is simple block schema of asexor:

Asexor

Asexor coding

So let’s look now at code to give you an idea how easily a solution with asexor can be created (code is only fractional to demonstrate key features of asexor):

First we need to create some task(s),  for demonstration purposes let’s create dummy task running linux date command:

class DateTask(BaseSimpleTask):
    NAME = 'date'
    COMMAND = 'date'
    ARGS = [BoolArg('utc', '-u'), Arg(0)]
    MAX_TIME = 5

    async def validate_args(self, fmt, **kwargs):
        return await super().validate_args('+' + fmt, **kwargs)

    async def parse_result(self, data):
        logger.debug('Result for date task executed for user %s', self.user)
        return data.decode(self.output_encoding).strip()

As you can see task is simply calling  date program with two arguments – mandatory  argument format (which is prefixed with + in validate_args method as required by program) and optional argument -u  (for UTC time output).  The result of the task is just output of date  command as unicode string. So nothing special, but should give you an idea how to create asexor tasks – for some real application tasks could be more complex and use for instance conversion programs like ffmpeg, image-magic … Notice that methods of the task class are defined as coroutines  ( async def).

Next we need to run asexor backend with this task (and any other tasks we would like to handle):

load_tasks_from('simple_tasks')

Config.WS.AUTHENTICATION_PROCEDURE = dummy_authenticate_simple
protocols =[(WsAsexorBackend, {'port':8484, 'static_dir':client_dir})]

runner = Runner(protocols)
runner.run()

First we need to load supported tasks –   this can be done easily with function load_tasks_from, which loads all tasks from given module. Then we need to update asexor configuration ( with at least authentication function or coroutine, which takes a token sent by user and returns authenticated user id and optionally user roles).
We also need to define protocols, which asexor backend will support ( each protocol is a tuple of protocol class/factory and protocol parameters) and finally run  the instance of Runner class ( which runs asexor backend indefinitely until terminated by OS signal) .

Now the only thing that is left is some code in Javascript for web client, it’s also fairly simple.  We can use asexor_js_client library and with its help skeletal code for our client will look like below (using ES6 and jQuery):

let client = new AsexorClient(window.location.host, USER_TOKEN);
client.connect()
  .then(()=> {
      console.log('Client ready');
      });

let task_updated = function (task_id, data) {
    console.log('Task update', task_id, data);
    // show task results or errors
}
client.subscribe(task_updated);

$('#run-task').on('click', function (evt) {
    let args=[$('#date-format').val()];
    let kwargs={utc:$('#date-utc').prop('checked')};
    client.exec('date', args, kwargs)
       .then(function(res) {
            console.log('Task id is '+ res);
            // show that task was submitted and remember task id
        })
})

Interacting with asexor from Javascript client consists of 3 main actions:

  1. Connect to asexor – create AsexorClient class instance and connect
  2. Submit task – using client.exec method, which takes task name and its positional and named parameters.   Method returns task id ( to be used to match further task updates) or throws an error, if anything went wrong.
  3. Process updates for given task – via the function that must be registered with client.subscribe

For bit more detailed demos of asexor look into asexor/test directory for dummy_* files.

Deployment

Asexor is basically a toolkit, so for deployment you should first build your own backend server module.  This module should run as a daemon process,  possibly  behind reverse proxy (nginx, haproxy) that can also provide SSL offloading or load balancing in case that horizontal scaling of asexor is needed.

In RUST We Trust

$
0
0

Having been programing recently mostly in dynamic untyped languages (aka Python and JavaScript) I though that it would be nice to try something else, bit different –  meaning compiled and statically typed. Last adventures in this area were with OCAML, which I used for few learning projects couple years ago( like this one).  OCAML is very nice language indeed, and learning exercise was very valuable for me (especially getting more accustomed to functional programming style),  but apart  of that learning experience I did not follow it  further (mainly due limited ecosystem of OCAML).

Looking recently to languages and technology survey on Stackoverflow  where Rust is leading the list of most “loved” languages (meaning developers who used the language like it and want to use it for their next projects) with head start on   second one (SmallTalk) .   This caught my attention and looking quickly at Rust site I decided to give it a try.  Below are my first experiences learning this language.

Learning RUST

Rust borrows concepts from many established languages (C/C++ like syntax and primitive types, Ocaml/Haskel like type system with algebraic types and  generic types, interfaces (called traits here) and functional features – closures, higher order functions, immutability by default, etc.)  and adds few new concepts (ownership, borrowing, lifetimes) – the result is quite interesting, but not exactly easy to learn, so I’d recommend to starts with some  books (It actually helped me to read about some new concepts in few different books, because each book had bit different approach):
The Rust Programing Language 2nd Edition” – is the official RUST book from Mozzilla team, 2nd edition is completely rewritten (but yet not fully complete)  and it’s much easier for a beginner to comprehend  then 1st edition,  so I’d recommend to start with this one.
Programming Rust” by Jim Blandy; Jason Orendorff, published by O’Reilly,   currently available as pre-relase only,  but should be published soon by now. Also very nice introductory book,  going bit more in depth on some topics that are just touched in previous book  ( chap. 19), but which, in my opinion, are very much needed in real programming.

Apart of these two books I’ve found these three resources extremely useful:
Rust by example” – online examples for various RUST features, which can be interactively run and modified.  Great to quickly check basic concepts.
Learning Rust With Entirely Too Many Linked Lists”  is great RUST tutorial, where you are learning Rust as you are building various linked lists.  I liked author approach of try-and-fail experiments, which very much reminded me my struggle with first programs (binary sorted tree etc.).  By  trying some obvious approaches, failing them and explaining what went wrong, author clearly demonstrated some key features of RUST and some not so obvious issues with the code (releasing lists for instance).
24 Days of Rust” by Zbigniew Siciarz, language is not only about it’s syntax, semantics and core library, but also about whole ecosystem of available libraries, in this online book author walks us through numerous more or less popular Rust third party libraries (the number of currently available Rust libraries is surprisingly high considering short history of the language) .

Tools

Installation of core Rust tools is piece of cake. Rustup utility enables us to have several versions of Rust tool chain, it’s particularly useful to have latest “nightly” build around, because Rust is still evolving very rapidly and some newer features are available now only in nightly.

Key tool you will interact with is is cargo – it’s Rust package manager, build manager and test runner, all in one. It’s very nice and intuitive tool, I was able to use  it immediately, without any issues.

Concerning editors –  Rust has support for many common editors including Vim, Emacs, Atom, Sublime3  and Eclipse. However finally I’ve found that most comfortable editor (at least for my learning exercises) was Visual Studio Code with Rust for Visual Studio Code extension configured to use Rust Language Server ( although RLS is in alpha stage, it works reasonably well, with occasional hiccups – like when using undo in editor – luckily restart of RLS is very easy – just click on status bar).

Experiences

Rust is advertised as system programming language, that is intrinsically safe and provide zero-cost higher level abstractions.    I do not have very much experiences with system programming,  so I can rather compare to my previous experiences (Python, C#, Java, Ocaml, JS).  Interesting is the notion about zero-cost abstractions –   it basically means that you can use some seemingly higher level abstractions  – like iterators or generic types, but they are implemented very efficiently, as if you’d write code in traditional system language – C/C++.

Overall experiences are positive – Rust  feels as very modern language, with many progressive features we’ve seen in other languages in past years.  I personally like these features from first sight:

  • Type system is very powerful, few picks:
    • Option (to represent types with potentially no value, this is great tool to overcome notorious Null errors)
    • Result (to represent error in processing, Rust does not use exceptions)
    • Traits can implement new behavior for existing types ( something we can do in Javascript with prototype manipulation, but here in Rust it’s completely type safe)
  • Iterators are super powerful in Rust – we have all higher level functions from functional languages and more
  • Closures – closures syntax is very concise, it plays very well in higher order functions
  • Testing is integrated into core language – you can write unit tests directly within source file, they will compile only if you run them with cargo test command, but you can also you write separate test files (so called integration tests).
  • Pattern matching is great for productivity and code readability
  • Parallel processing is very easy with Rust –  apart of classical threads (which are mapped to OS threads, so limitations of Python, OCAML etc.  and which enjoy improved safety of Rust language ,so it’s much easier to use them) there are also build-in channels for threads communication and some great third party libraries like rayon, which turns regular iterator into parallel iterator, where individual items are process concurrently in multiple threads ( all this with just one method call – par_iter() – it’s absolutely amazing!).

Concerning expressiveness of the language, here is one quick example – following function finds value in URL query string by it’s key, returns default, if the key is not found:

fn extract_qs<T:FromStr+Copy>(path: &str, name: &str, default: T) -> T {
    let mut url="http:".to_string();
    url+=path;
    Url::parse(&url)
        .ok()
        .and_then(|url| {
                      url.query_pairs()
                          .find(|pair| pair.0 == name)
                          .map(|n| T::from_str(&n.1).unwrap_or(default))
                  })
        .unwrap_or(default)
}

The function takes path with query string and returns value of one query string parameter identified by name or some default value.  Key concept to illustrate here is usage of higher order functions like map, find, and_then .   Function is doing basically this – first it normalizes path to URL (with an arbitrary scheme, absolute URL is needed for next function), then   function Url::parse returns Result, which represents parsed url or error. We ignore error with ok() method (turn it into Option type, so error becomes None). If Option has value, we iterate through all query string pairs, find one with right name and try to convert it to output type. If we do not find it or cannot convert its value from string, we use default value.  If we know roughly semantics of used methods, then whole intent of this function is pretty clear and reads almost as easily as human language sentence.  And all possible failures (malformed query string, missing key, invalid value in query string)  are already handled ( here by returning default value).   You can also mention that this function is  using generics, so it’ll work for any type that can be parsed from string and copied – which are basically all primitive types like integer, float, boolean.

However not all things in Rust are so nice and easy going as I described above.  Here I mean particularly Rust very special features Ownership, Borrowing and Lifetimes –  all these three features are very closely interrelated and are embedded  in very core of Rust language, so you meet them practically on every line of your code.    For me, at least initially, it was quite hard to cope with them, because they somehow contradicted with my current experiences and intuition. Errors like “value does not live long enough”, “cannot borrow”, “use of moved value” were omnipresent.  Luckily compiler provided very detailed error messages, often with advice, how problem can be resolved (which I think is quite unique),  so after some trials and failures and I was able to progress in majority of cases.

The ownership rules could be pretty limiting in some cases and may require you to rethink your design from scratch or to look for more advanced features of the language like reference counting  or internally mutable cells (not to speaking about unsafe code, which I try to avoid for now).  The compiler component, responsible for ownership rules, is called “the borrow checker”  (abbreviated often familiarly as TFBC – you may guess what F stands for). During my experiments the borrow checker often drove me mad and it took quite a while to understand what it’s complaining about. Then usually two resolutions arose –   either the “Yes, of course” revelation – when I understood what was the issue and fix was obvious and quick,   or “Oh no, not this”, when I realized that my approach was completely wrong and I had to start from scratch.   Now I know bit more, so I’m able to prevent some basic issues, but this aspect of Rust is still painful for me and it’ll require more time to get right intuition here.

There are a tons of positive great things in Rust, but sometimes it also could be pretty hard and definitely it’s not a programing language that can be learned ‘quickly’ (whatever quickly means to you).   In these advertising videos prepared by Mozilla one guy said, “Come to Rust and you’ll feel like you suddenly have superpowers”, I have to admit that often rather I felt that I’m superstupid. But overall feeling now is positive and I’d like to try more small projects in Rust.

My Toy Rust Project

The only way how I can learn anything about new language is to try to write some code over and over again, staring with simple code (exercises from books, few obvious algorithms and data structures like quick-sort or binary tree etc.) and gradually progressing to more complex stuff. Presenting those overused exercises would definitely be not interesting, so I created one small toy project called Bilbo Babbit Babbles –  which generates nonsensical sentences using trigram model from arbitrary plain text documents (defining language corpus).

If you’d like to try it you can easily build docker image from this file. Or temporarily it’s also online here.

So as final words of this article I use the sentence generated by this program (using collected Sherlock Holmes works from A.C. Doyle as language corpus):

“Six thousand a year so what had caused me to make an occasional ten-pound note upon a patched Dunlop.”


Blockchain madness

$
0
0

Some technologies I really notice only when they hit me directly into the face.   That’s the case of blockchain  –  I have been looking into Bitcoin several years back and found it quite interesting (especially from cryptographic perspective – as interesting usecase for applied cryptography), but never expected that it’ll reach such extensive grow in popularity as we have seen in past half year or so.   This forced me to looked again into these technologies and get bit more detailed understanding about blockchain technologies, why it’s so popular now and particularly look at recent development and on  next big player in this area Ethereum project.

In this article I’ll share some initial thoughts of mine about blockchain, what I think it is and why it matters. In later article(s) we’ll look into  Ethereum from purely practical perspective. We will build a local playground for Ethereum, where we can try immediately some basic functions of the system.

So what is the  “blockchain”?

For me blockchain is unification of three core concepts which work closely together:

  • peer-to-peer network of open source clients
  • append-only public database (blockchain in its specific meaning of the word) that stores  “messages” from the peer-to-peer network and is organized as blocks of records,where recent block seals previous blocks and assures their integrity. Blocks are replicated across clients.
  • consensus protocol that enables clients to store “messages” in blockchain database in a consistent manner – e.g. in a way where majority of clients  agrees that stored messages are “valid” and also agrees on the order in which they are stored in the blockchain DB.

blockchain2

While the implementation with trusted (by all clients) central entity, which maintains the master blockchain database, is relatively simple, the key value of current blockchain technologies is  that systems are  decentralized, with no central trusted entity and they can work properly even if a minority of peer-to-peer clients (weighed by their contribution to consensus, not necessary by pure numbers)  is malicious and they are trying to actively misuse the system. To achieve the decentralization and resilience to such attacks blockchain  systems are based on modern cryptography.

While components of the blockchain existed before Bitcoin, only in Bitcoin they have been ingeniously glued together by mysterious Satoshi Nakamoto and it was Bitcoin that started era of blockchain systems as we see them now.  After Bitcoin we have seen myriads of similar projects, some were almost identical to Bitcoin (cloning Bitcoin and changing few parameters) , some were inventive and discovered new possibilities in blockchain technologies. Ethereum is one of such systems, going beyond original scope of Bitcoin to provide a digital currency and creating trusted decentralized computing platform.  Ethereum can execute code pieces called  Smart Contracts on clients in peer-to-peer network and this code maintains shared state of the systems maintained in blockchain. With Smarts Contracts one can implements things like new digital currencies, trusted voting systems, gambling systems, predictions markets, central registries, blind auctions and much more.  Theoretically anything can be done, because Ethereum Smarts Contracts are Turing complete.

Why to care about blockchain?

I think there are two main reasons why blockchain is interesting – financial and technical – so let’s look at then in more details.

Financial aspect

Cryptocurrencies and blockchain technologies attracted attention of financial investors in past years and now there  is significant amount of money circulating in the cryptocurencies – right now at the time of writing of this article market capitalization of top 10 cryptocurencies is about $75 billions (. app. 1/10 of Apple, which is company with biggest market cap).  Speculative trading with cryptocurencies becomes more and more populars and we hear many stories about people who made a fortune on cryptocurencies trading (if you invested $1000 in Ether on Jan 1st 2016, cryptocurency of Ethereum, your investment would be worth now approximately $24k, but because cryptocurrencies market is very volatile you may as well loose your money in future).

Frantic speculative investments is not the only aspect of financial activities around blockchain.  We can see also numerous new companies that appear out of nowhere promising to create innovative solutions based on blockchain technologies.  And surprisingly easily such companies found financing worth  millions of $,  usually through cryptocurrency offerings – so called ICOs (Initial Coin Offerings),  where company creates new cryptocurrency (which is now extremely easy in Ethereum), selling that currency to public, promising some king of participation on future success of the company.  To start such ICO it’s enough to have website and some “whitepaper” about using blockchain or improving blockchain.  Many of such “companies” already proved as scum,  others even if they have good ideas and honest intent will struggle in future to execute that.  One satirical example of current situation around ICOs is this website Useless Ethereum Token, which is ICO that plainly announced that all money send to it will be use only for someone’s personal benefits and sender will receive nothing in return. Yet it seems some people send money (Ethers) to it and currency (UET) is traded on some exchanges (I do not believe that guy made $65k he claimes, if you look into blockchain, only $4.6k worth of ether came into the contract, but still interesting that something that proclaims itself as completely useless is gaining a value).

The situation now around blockchain and cryptocurrencies reminds me dot-com bubble from mileanium end.  Then also a lot of speculative money went into technological companies based on unrealistic expectations of their future profits. It’s my personal opinion that many cryptocurrencies and blockchain companies are speculatively overestimated and we might see collapse in future,  probably even worth then dot-com one, because cryptocurrencies markets and ICOs are basically not regulated at all.

Technological aspect

Apart of financial frenzy around blockchain technological aspect is surely interesting.   Technology is relatively new and it’s not clear yet what will be it’s implications.  Ethereum project is speaking about Web 3.0 as new revolution in web technologies, serverless  applications communicating with peer-to-peer blockchain  network  that maintains applications logic  and state (but this is only one of competing visions for next ‘version’ of the web) .  My current feeling is that blockchain technologies are slightly over-hyped, probably due to their financial aspect.  From popular articles it  may look that all future computing will be running in blockchain ( like for instance this discussion about implementing neural networks and deep learning in blockchain).  Blockchain surely brings some interesting possibilities for distributed computing, especially possibility to have distributed  database/ledger, which is consistent by consensus and updated in decentralized ways.   However this comes at costs of massive replication and redundant efforts – in Ethereum for instance each computation must be done on every node in the peer-to-peer nerwork and system status is replicated  on each node too – which basically means inherited inefficiency and  performance limitations. For certain type of applications it’s desirable compromise to leverage other unique features of blockchain, but for other applications, which require intensive computation and processing of huge amount of  data (like above mentioned neural networks and deep learning) it’s limiting.

One of key  assets of blockchain technology is possibility to replace trusted central authority with decentralized solution, which assures similar level of security and safeguards.  So majority of blockchain based projects is about to replace this or that central authority (central bank, stock exchange, logistic company, lottery organizer, etc.), promising that system will work much better without central trusted entity.  While it might be good solution in many cases I believe it’s not an universal solution.  Often it’s easier and more efficient to trust certain central authority, which has good incentives to keep system running and behave properly. Trusted central authority can also help  with arbitrations, in cases where technology fails (look for instance at The DAO hack, when Ethereum  project initiated hard fork of the blockchain (splitting system into two “independent” ones – Ethereum and Ethereum Classic) to refund $50M of stolen Ethers and thus bypassing the key foundation principle  of the Ethereum – immutability of the blockchain).

But enough of theoretical talk, the best way how to understand some technology is to play with it and that’s what we will do in the next article.

Ethereum local playground

$
0
0

In past article I’ve talked generally about blockchain technologies, in this article we will look into Ethereum from user perspective. We will build local playground, where we can test many functions of Ethereum(Ethers transfers, using and writing smart contracts and more) without spending real Ethers (and thus real money). This guide in intended for users with Linux OS.

Setting up Ethereum on my computer

I’ve explained that Ethereum is distributed peer-to-peer network.   If we join main network any operation in the network costs Ethers, which represent real money.  To play for free we need to join test network, or even better create local development network, which is basically degraded to one node – our client.  Such environment can be very easily set up and yet enable us to try almost all possibilities  of Ethereum network. There are many tutorial how to start with Ethereum client, connect to test network, get some test Ethers and play around. However as Ethereum is developing rapidly, many of them are outdated – so that’s also reason why I wrote down my experiences here.

First let’s install client – there are many Ethereum clients,  I tried geth ( written in Go) and parity (written in Rust). I personally found parity more advanced and easier to use then geth (with Mist browser), so I’ll continue with parity.

1. Install Parity

On linux it’s piece of cake, just run:
bash <(curl https://get.parity.io -Lk)

Installation is superfast!

2. Run Parity

Start Parity with following arguments:
parity --chain dev --tracing=on --fat-db=on --pruning=archive --jsonrpc-cors http://ethereum.github.io

Argument --chain dev starts parity in development mode, with local blockchain, where each transaction is immediately written to blockchain. So it’s ideal as our local playground.  Other arguments will be explained later.

3. Open Parity wallet in browser

Open this url in browser: http://127.0.0.1:8180

Go though initial setup wizard to  create your account.

4. Get some Ethers

In order to do anything interesting in our local blockchain we need some Ethers –   it is easy in development mode – in Browser go to Accounts / Restore and restore account with empty account recovery phrase.  It restores account with enough Ethers for any tests.

Playing around

First thing to try is to send some Ethers from one account to  another, which is quite straightforward.  In Accounts tab select account  and then Transfer.  The interesting part of Transfer form is on “advanced sending options”,  where we can select maximum amount of gas and gas price, which together determine limit for transaction fee ( amount of gas x gas price).  Also conditions to send transaction in future can be set here.

Each transaction has to be authorized and signed by account owner – see  dialog below:signature-screen

After transaction is sent to network, we get transaction hash as it’s reference, which is linked to etherscan.io blockchain explorer. Unfortunately this does not work in our setup, because etherscan.io is exploring main blockchain (or test networks), but not our private development one.  But we can easily set up local replacement – etherchain light – installation is standard as per instructions, parity client must run with -tracing=on --fat-db=on --pruning=archive options.  Below is detail of transaction we’ve sent before (copy link from parity wallet, paste it into etherchain light search box and delete everything before 0x):
transaction2

 Wallet is ready to use Smart Contract

As I have explained before Ethereum key feature is Smart Contract – a code that is executed in blockchain. Parity comes with few useful “ready to use” smart contracts.   One of them is multi-signature wallet – a contract that stores Ethers for a  group of accounts and several signatures are needed to transfer Ethers from the wallet.  Parity wallet is also good example of potential perils hidden in contracts programming –   just recently implementation of Pahrity wallet had issues which enable unknown hackers to steal 150K Ethers worth $30M.   Such incidents are not so rare in Ethereum (we already mentioned The DAO case in previous article) and show us that complete security is often hard to achieve even for experiences contracts developers. In latest version of Parity wallet contract is already fixed (but it does not fix already deployed contracts, so  wallet users had to move funds from broken wallets).

We can easily try multi-signature wallet ourselves –  add more accounts and follow the directions from link above, we can create for instance wallet with 3 owners, requiring 2 signatures to send money out, if transfer value is above daily limit (which is set during wallet creation).  Also any change to wallet parameters later – like changing daily limit – requires two signatures. We can try few transactions with the new wallet:

  • send some Ethers to wallet – it’s same as sending  Ethers between accounts, just select wallet as recipient
  • sent amount smaller then daily limit from wallet to other account – again it’s pretty standard
  • send amount above the daily limit – now it becomes more interesting – while sending we receive warning that operation has to be approved by other owners.  After we send transaction a request for additional confirmation appears on wallet page as shown below (may need reload page when using dev chain):


multiwallet

  • change daily limit –  two accounts must request exactly same change in order to the change to apply

Developing our first contract

Above we’ve tried packed contract, now let’s try to develop a Smart Contract ourselves.   Smart contracts are developed in language call Solidity (also some other languages exists).  Solidity is language similar to Javascript, but it’s typed and compiled to EVM (Ethereum Virtual Machine) bytecode. We start with very simple contract that acts as a global dictionary/hashmap, where everybody can set a string value to given string key (or overwrite existing) and later get the value by querying with yhe key:

pragma solidity ^ 0.4.0;

contract Dictionary {
    mapping(string=>string) private map;
    
    function set(string key, string value) {
        map[key]=value;
    }
        
    function get(string key) constant returns(string) {
        return map[key];
    }
}

Main construct in Solidity is the contract, which is similar to class in OOP – it can contain properties and methods. Contract properties are persisted in Ethereum blockchain. Our contract has just one property, which of type mapping – Solidity built-in hashmap and two method get and set – quite straightforward implementation.  Thanks to it’s familiar syntax it easy to start with Solidity programming, but this simplicity can be deceiving – Solidity can have it’s quirks, which have fatal security implications (two before mentioned hacks of Ethereum were result of overlooked features of Solidity – recursive calls of contracts and default visibility of methods) – so thorough security review of real contracts is a must.

Now we can deploy our simple contract into dev chain –  in Parity wallet go to Contracts tab, click Develop and then New, paste there the  code and click Deploy. Fill contract name and account, which sends contract creation transaction. Click Next, confirm transaction with account password and new contract is created – you see its address. Now we can play with the contract  – open it from Contracts tab and try to get some values via querying  get method – results are empty strings as we have not store anything in our contract yet. Click Execute and use set function to store some value for some key, verify latter that key contains the value via querying get method again.

Screen for executing method on contract:
call_method

 Bit more advanced contract and better development environment

While development environment in Parity is fine for simple contracts,  it’s pretty basic (most annoying for me was lack of detailed messages for syntactic errors). But we can easily use other development environment, which is more sophisticated – Remix – it is written in Javascript and is available online – just click link before.  Remix has it’s own VM (Environment is JavaScript VM), where we can test contracts without any interaction with Ethereum blockchain or we can connect it to our  Parity client (Environment is  Web3 Provider). Remix is connected to Parity via JSON RPC, as Remix is started from online URL, Parity must allow cross site browsing – thats exactly why argument  --jsonrpc-cors http://ethereum.github.io is needed on Parity startup.

Our first contract was pretty stupid, now we can try to improve it to something more useful –  a central registry of names. For a small fee users can register any name (string) and assign to it any value(string). Once registered the name cannot be registered or its value changed by  anybody else, but owner can transfer it to other person. Here is contract for our registry:

pragma solidity ^0.4.0;

contract Registry {
    struct Entry {
        string  value;
        address owner;
    }
    
    mapping(string=>Entry) private map;
    
    uint public fee;
    address registrar;
    
    function Registry(uint initialFee) {
        fee = initialFee;
        registrar = msg.sender;
    }
    
    function register(string key, string value) payable {
        //registration has fee
        require(msg.value >= fee);
        if (map[key].owner == address(0)) {
            // not owned by anybody
            map[key] = Entry(value, msg.sender);
            
        } else {
            // already owned by somebody
            // then only owner can register new value
            require(msg.sender == map[key].owner);
            map[key] = Entry(value, msg.sender);
        }
    }
    
    function transfer(string key, address to) {
        require(map[key].owner == msg.sender);
        string storage value = map[key].value;
        map[key] = Entry(value, to);
    }
    
    function query(string key) constant returns(string) {
        return map[key].value;
    }
    
    function withdraw(uint amount) {
        require(this.balance >= amount && registrar == msg.sender);
        msg.sender.transfer(amount);
    }
}

Few things to note here:

  • we define complex type Entry with struct keyword
  • method Registry (same name as contract) is constructor of the contract – we use it to set amount for registration fee and account that is “registrar”, one that created this contract and can use registrations fees.
  • method register requires that it’s called (contract method call is transaction in Ethereum) with some amount of Ethers – representing registration fee – registration is payed service. Ethers are then stored in this contract’s balance and only registrar account can transfer them latter to his account with withdraw method
    Also note that mapping in Solidity returns default value for non-existent keys (Entry with address 0 and empty string). This is a consequence of how mapping is implemented in EVM.
  • owner can transfer registered name to other account with transfer method
  • anybody can query for registered names

Now we can play with with contract in Remix – paste the code and click Publish, then fill minimum registration fee in box after Create button and click Create button. Contract is created and we can interact with it’s method – register some name (must fill Value input with registration fee, strings must be surrounded by double quotes),  query names etc. Also note that methods can be called from different accounts (Account select with account address and balance).

Deployed contract in Remix:
remix

We can also deploy contract to dev blockchain in running Parity client( or whatever chain is active in the client). Just switch Environment to Web3 Provider and Publish and Create contract again. In Parity wallet authorize contract creation transaction. We can interact with contract here in Remix in a same way as before (but it is new contract) or we can use it in Parity wallet – copy its address (Copy address button) and in Parity wallet on Contracts tab click Watch. Select Custom Contract and click Next. Paste address, fill name and copy contact interface definition ABI (which is JSON describing available methods), ABI is in Interface field in Contracts Details in Remix. Finally click Add Contract.

Connect to network

Until now we have been able to work with disconnected Parity client, now it’s time to connect it to the test network Kovan, it’s still not main blockchain, but we can try interactions that behaves similarly to main network.  We need to stop Parity client and start it again with this command:

parity --chain kovan

at the time of my testing Parity had problem with synchronization using quick warp method, if you’ll have similar problem you can try:

parity --chain kovan --no-warp

Now we have to wait for a while (can be hours in case of slower sync). In meanwhile we can connect to Parity wallet and create accounts (as we are on different blockchain we will have completely new accounts)  . We can also  try to receive some Kovan Ethers, which we’ll need for future tests.  Kovan network provides several faucets, which give you Kovan Ethers for free. Easiest to use is gist based faucet, just create gist document with address of your account and run:

curl http://github-faucet.kovan.network/url --data "address=url_of_your_gist"

By this method account can receive one Kovan Ether per day.

Create our own currency

We are going to try one more Smart Contract – ERC20 Token –   this is standard for smart contract representing custom currency implemented in Ethereum –  ERC20 Tokens are often used in ICOs and Ethereum wallets have support for such contracts. Luckily Parity has pre-built support for both creation and usage of ERC20 tokens.

Let’s start in Contracts tab with Develop/Load and load Token.sol from Snippets:

// Abstract contract for the full ERC 20 Token standard
// https://github.com/ethereum/EIPs/issues/20

contract Token {
    /* This is a slight change to the ERC20 base standard.
    function totalSupply() constant returns (uint256 supply);
    is replaced with:
    uint256 public totalSupply;
    This automatically creates a getter function for the totalSupply.
    This is moved to the base contract since public getter functions are not
    currently recognised as an implementation of the matching abstract
    function by the compiler.
    */
    /// total amount of tokens
    uint256 public totalSupply;

    /// @param _owner The address from which the balance will be retrieved
    /// @return The balance
    function balanceOf(address _owner) constant returns (uint256 balance);

    /// @notice send `_value` token to `_to` from `msg.sender`
    /// @param _to The address of the recipient
    /// @param _value The amount of token to be transferred
    /// @return Whether the transfer was successful or not
    function transfer(address _to, uint256 _value) returns (bool success);

    /// @notice send `_value` token to `_to` from `_from` on the condition it is approved by `_from`
    /// @param _from The address of the sender
    /// @param _to The address of the recipient
    /// @param _value The amount of token to be transferred
    /// @return Whether the transfer was successful or not
    function transferFrom(address _from, address _to, uint256 _value) returns (bool success);

    /// @notice `msg.sender` approves `_addr` to spend `_value` tokens
    /// @param _spender The address of the account able to transfer the tokens
    /// @param _value The amount of wei to be approved for transfer
    /// @return Whether the approval was successful or not
    function approve(address _spender, uint256 _value) returns (bool success);

    /// @param _owner The address of the account owning tokens
    /// @param _spender The address of the account able to transfer the tokens
    /// @return Amount of remaining tokens allowed to spent
    function allowance(address _owner, address _spender) constant returns (uint256 remaining);

    event Transfer(address indexed _from, address indexed _to, uint256 _value);
    event Approval(address indexed _owner, address indexed _spender, uint256 _value);
}

It defines an interface for ERC20 compliant token. Next we can look at standard implementation StandardToken.sol:

pragma solidity ^ 0.4.0;
/*
You should inherit from StandardToken or, for a token like you would want to
deploy in something like Mist, see HumanStandardToken.sol.
(This implements ONLY the standard functions and NOTHING else.
If you deploy this, you won't have anything useful.)

Implements ERC 20 Token standard: https://github.com/ethereum/EIPs/issues/20
.*/

import "Token.sol";

contract StandardToken is Token {

    function transfer(address _to, uint256 _value) returns (bool success) {
        //Default assumes totalSupply can't be over max (2^256 - 1).
        //If your token leaves out totalSupply and can issue more tokens as time goes on, you need to check if it doesn't wrap.
        //Replace the if with this one instead.
        //if (balances[msg.sender] >= _value && balances[_to] + _value > balances[_to]) {
        if (balances[msg.sender] >= _value && _value > 0) {
            balances[msg.sender] -= _value;
            balances[_to] += _value;
            Transfer(msg.sender, _to, _value);
            return true;
        } else { return false; }
    }

    function transferFrom(address _from, address _to, uint256 _value) returns (bool success) {
        //same as above. Replace this line with the following if you want to protect against wrapping uints.
        //if (balances[_from] >= _value && allowed[_from][msg.sender] >= _value && balances[_to] + _value > balances[_to]) {
        if (balances[_from] >= _value && allowed[_from][msg.sender] >= _value && _value > 0) {
            balances[_to] += _value;
            balances[_from] -= _value;
            allowed[_from][msg.sender] -= _value;
            Transfer(_from, _to, _value);
            return true;
        } else { return false; }
    }

    function balanceOf(address _owner) constant returns (uint256 balance) {
        return balances[_owner];
    }

    function approve(address _spender, uint256 _value) returns (bool success) {
        allowed[msg.sender][_spender] = _value;
        Approval(msg.sender, _spender, _value);
        return true;
    }

    function allowance(address _owner, address _spender) constant returns (uint256 remaining) {
      return allowed[_owner][_spender];
    }

    mapping (address => uint256) balances;
    mapping (address => mapping (address => uint256)) allowed;
}

Above is basic implementation of currency –  you can see there use of inheritance (contract X is Y)  and events (events are  defined as event constructs and fired within method with particular arguments). We looked at previous two contracts just for reference – to understand how ERC20 token works.  Now we  implement our own token in just few lines of code by inheriting from StandardToken:

pragma solidity ^0.4.0;

import "StandardToken.sol";

contract MyToken is StandardToken {

    
    // Optional token info
    string public name;                   
    uint8 public decimals;                //How many decimals to show.
    string public symbol;                 

    function MyToken(
        uint256 initialAmount,
        string tokenName,
        uint8 decimalPlaces,
        string tokenSymbol
        ) {
        balances[msg.sender] = initialAmount;
        totalSupply = initialAmount;
        name = tokenName;
        decimals = decimalPlaces;
        symbol = tokenSymbol;
    }
}

Create contract above as new contract in Parity (with appropriate arguments) and deploy it.  Once our token contract is deployed we should register it in Token Registry application.  In Parity wallet go to Applications tab and start Token Registry application. In this application register our new token –  enter token contract address and name, TLA ( 3 letters symbol) and decimals ( these 3 values does not have to be necessarily the same as ones used in token contract creation, as in token contract they are fully optional). Then submit registration  transaction (costs 1 Koven Ether) and new token is registered. Then add  icon to it (with Add meta-data button – add there link to image – two transactions are executed – one to register URL (hintURL), other to update meta-data (setMeta)). Finally our new token registration record may look like below:
tokenOnce token is registered (with Image) reload Parity wallet in browser and in Accounts you should see our new currency (creating account should have all initial supply of the currency):

accountYou can also use new currency in Transfer function (by selecting type of token transfer).

———

In next article we will look at distributed applications-  DAPPs (we already used one – Token Registry),  which combines contracts and current Web apps (HTML, JS, CSS) into fully functional application than can leverage advantages of the blockchain.


Writing Distributed Application for Ethereum

$
0
0

In past article I’ve written about some basic stuff we can do with Ethereum client Parity – like transfering Ethers, creating multi-signature wallet and even writing our own contracts. Now I’ll continue with writing our very own Distributed Application ( Dapp).

What is Dapp?

In my understanding Distributed Application  is combination of contract(s) deployed in Ethereum blockchain and browser based UI that enables easy interaction with contracts. Some of application logic that is  normally hosted in server,  is in Smart Contracts in the distributed system – Ethereum – so that why they are called distributed. System is shown on following picture:
dapp-schema

So Dapp consists of two parts – browser client, written in Javasript and Smart Contract(s), written in Solidity (or other Ethereum language). Browser calls contract(s) via JSON-RPC  (interface is standardized across Ethereum browsers, so Dapp browser part can theoretically work with any client). Though we can call directly JSON-RPC methods from general JavaScript, it’s much easier to use existing library web3.js, which provides convenient objects and methods.

Our Dapp – Name Registry

For our demo Dapp we use contract from previous article, but improved slightly by adding event to notify about new name registration:

pragma solidity ^0.4.0;

contract Registry {
    struct Entry {
        string  value;
        address owner;
    }
    
    event Register(string name, address who);
    
    mapping(string=>Entry) private map;
    
    uint public fee;
    address registrar;
    
    function Registry(uint initialFee) {
        fee = initialFee;
        registrar = msg.sender;
    }
    
    function register(string key, string value) payable {
        //registration has fee
        require(msg.value >= fee);
        if (map[key].owner == address(0)) {
            // not owned by anybody
            map[key] = Entry(value, msg.sender);
            Register(key, msg.sender);
            
        } else {
            // already owned by somebody
            // then only owner can register new value
            require(msg.sender == map[key].owner);
            map[key] = Entry(value, msg.sender);
        }
    }
    
    function transfer(string key, address to) {
        require(map[key].owner == msg.sender);
        string storage value = map[key].value;
        map[key] = Entry(value, to);
    }
    
    function query(string key) constant returns(string) {
        return map[key].value;
    }
    
    function withdraw(uint amount) {
        require(this.balance >= amount && registrar == msg.sender);
        msg.sender.transfer(amount);
    }
}

For UI part we  use Aurelia (as I have played with Aurelia framework before, so this is good opportunity to refresh  knowledge), Bootstrap 3  and web3.js for communication with Ethereum client. The resulting code is here in github.

When creating this simple Dapp following two things showed as tricky:

  • Web application packing –  as several times before correct packing of web application was problematic. Finally web3.js worked correctly with webpack bundled application generated with Aurelia CLI and using recent version (3.5) of webpack.
  • Web3.js version –  initially I started with latest beta version (1.0), but it does not seem to be ready yet, documentation is brief and I was missing some functionality or it was not working properly, so I finally used stable version 0.20.  This is a pity, because 1.0.0 has much modern interface, using Promises etc.

The core ES6 class for interaction with Registry contract is client.js:

import Web3 from 'web3';


// needs to be changed to address of actual contract
const contractAddress ='0x2CdB6AE9F7B24fb636b95d9060ff0D0F20e836D6';
const contractABI = [{"constant":false,"inputs":[{"name":"amount","type":"uint256"}],"name":"withdraw","outputs":[],"payable":false,"stateMutability":"nonpayable","type":"function"},{"constant":false,"inputs":[{"name":"key","type":"string"},{"name":"value","type":"string"}],"name":"register","outputs":[],"payable":true,"stateMutability":"payable","type":"function"},{"constant":true,"inputs":[{"name":"key","type":"string"}],"name":"query","outputs":[{"name":"","type":"string"}],"payable":false,"stateMutability":"view","type":"function"},{"constant":true,"inputs":[],"name":"fee","outputs":[{"name":"","type":"uint256"}],"payable":false,"stateMutability":"view","type":"function"},{"constant":false,"inputs":[{"name":"key","type":"string"},{"name":"to","type":"address"}],"name":"transfer","outputs":[],"payable":false,"stateMutability":"nonpayable","type":"function"},{"inputs":[{"name":"initialFee","type":"uint256"}],"payable":false,"stateMutability":"nonpayable","type":"constructor"},{"anonymous":false,"inputs":[{"indexed":false,"name":"name","type":"string"},{"indexed":false,"name":"who","type":"address"}],"name":"Register","type":"event"}];

function toPromise(fn, ...args) {
    return new Promise((resolve, reject) => {
        if (! (typeof(fn) === 'function')) {
            reject("Param is not a function");
        } else {
        try {
        fn(...args, (err,v) => {
            if (err) {
                reject(err)
            } else {
                resolve(v);
            }
        })
        }
        catch(e) {
            reject("Function call error: "+ JSON.stringify(e));
        }
    }
    })
}

export class Client {
    constructor() {
        this.fee = 0;
        let web3;
        if (typeof web3 !== 'undefined') {
            web3 = new Web3(web3.currentProvider);
        }
        else if (window.location.pathname == "/register/") {
            // in parity
            let rpcURL = `${window.location.protocol}//${window.location.host}/rpc/`;
            web3 = new Web3(new Web3.providers.HttpProvider(rpcURL));
          } else {
            // set the provider you want from Web3.providers
            web3 = new Web3(new Web3.providers.HttpProvider("http://localhost:8545"));
          }
        this.web3 = web3;
        window.web3 = web3; // just for development

        
        this.registry = this.web3.eth.contract(contractABI).at(contractAddress);
        
        toPromise(this.registry.fee.call)
        .catch(e => console.log(`Fee error: ${JSON.stringify(e)}`))
        .then(v =>{
                this.fee = v;
                console.log(`Fee is ${this.fee}`);
                }
        );

        this._listeners = [];
        let fromBlock = this.web3.eth.blockNumber-10000;
        this.registry.Register({},{fromBlock, toBlock:'latest'}).watch((err,data) => {
            if (!err) {
                console.log(`Got event ${JSON.stringify(data)}`)
                setTimeout(() => {
                    for (let l of this._listeners) {
                        l(data);
                    }
                }, 0)
            }
        });

        this._listeners = [];
    }

    addListener(fn) {
        this._listeners.push(fn);
    }

    get connected() {
        let now = new Date();
        if (! this._last || (now -this._last) > 10000) {
            this._last = now; 
            this._conn = this.web3.isConnected();
            return this._conn;
        } else {
            return this._conn;
        }
    }

    query(name) {
        return toPromise(this.registry.query.call,name);
    }

    register(name, value) {
        let address = this.web3.eth.accounts[0];
        // fist estimate gas in local VM
        let data = this.registry.register.getData(name, value);
        let estimatePromise = toPromise(this.web3.eth.estimateGas,
            {
             to: this.registry.address,
             data:data,   
            from: address,
            value: this.fee});
        //then send it to blockchain
        let sendPromise = estimatePromise
            .then( (gas) => { 
            console.log(`Estimate succeded with ${gas}`);
            return toPromise(this.registry.register.sendTransaction, name, value,
            {from: address,
            value: this.fee,
            gas
            })
        });
        // and get reciept
        let receiptPromise = sendPromise.then(txHash => {
            let txSendTime = new Date()
            return new Promise((resolve, reject)=> {
                let checkReceipt = () => {
                this.web3.eth.getTransactionReceipt(txHash,
                    (err,r) =>{
                        if (err) {
                            reject(err)
                        } else if (r && r.blockNumber) {
                            resolve(r)
                        } else if (new Date() - txSendTime > 60000) {
                            reject(new Error(`Cannot get receipt for 60 secs, check manually for ${txHash}`));
                        } else {
                            window.setTimeout(checkReceipt, 1000);
                        }
                    });
                };
                checkReceipt();
            });
        });
        
        return {send: sendPromise, receipt: receiptPromise, estimate: estimatePromise};
    }


}

Client must know address of the contract  (contractAddress) and its interface (contractABI).  As I do prefer to work with promises rather then callbacks, there is an utility function toPromise that converts callback to promise.

Two functions, important for user interface, are query, which queries the registry, and register, which registers new name. Of these two later is more interesting  – the interaction with blockchain is done in 3 steps:

  1. Call is evaluated locally with web3.eth.estimateGas –  it executes contract method in local EVM.  More important then knowing consumed gas is the fact that call executes without problems.  If we do not check this now, we can easily send transactions that will fail ( for instance trying to register already registered name), but even such transactions are sent out and included in blockchain. This early check prevents such problems.
  2. Send out signed transaction – this step requires cooperation of Parity wallet, were transaction has to be signed.
  3. Get notification that transaction was included in the blockchain. Method web3.eth.getTransactionReceipt can return null, if there are not enough new blocks confirming our transaction ( to be reasonably sure that transaction is not in the orphaned block), so we have to try several times until receipt is available.

Method addListener enables to listen to Register events and update application about recently registered names.

Apart of the code above rest of the application is usual Aurelia UI stuff.   Finally application looks like this:
dapp1

And here is screen for querying registry:
dapp2

Other tutorials

You can check for instance this Parity Dapp tutorial – which is focused particularly on Parity’s special libraries integrating with React. I went through it (with some issues, partly related again to web application packaging) and it’s really nice. Parity libraries provides cool reactive components – like TransactButton button, which visualizes transactions steps. Such components can significantly speed up and simplify application development.

Conclusion

We only scratched surface of distributed applications development, real applications are indeed much more complex, with numerous cooperating contracts in blockchain, dynamically created contracts etc.  But it’s first step and it’s not very difficult – web part is basically regular web app development with one additional library – web3.js and few gotchas – especially around sending transactions out.  Smarts contracts language Solidity is also relatively easy to comprehend, but as we’ve shown in previous articles it can be deceiving and one can make fatal errors, which make distributed application vulnerable. Security review of contracts based of solid understanding of Ethereum blockchain is a must for real applications.

The Splendors and Miseries of CaaS – Experiences with Openshift3

$
0
0

Container as a Service (CaaS) is increasingly popular cloud service (usually categorized under Platform as a Service family of cloud services). It can provide easy ways how to deploy web applications leveraging Linux container technologies usually most popular Docker containers.  Recent addition to this family is Openshift v3 from RedHat.   Openshift is available as an open source  software (Openshift Origin) or as a hosted service (OpenShift Online).  I already used previous version of Openshift service (v2), as described in my previous article. In this article I’ll share my recent experiences with Openshift v3 service (also called NextGen).

Openshift NextGen Generally

Epithet NextGen was probably given to stress that new version of Openshift is radically different form the previous version. That’s absolutely true, while previous version was basically proprietary solution, NextGen is based on more common technologies – Docker and Kubernetes particularly,  so one can expect to enjoy all goodies of Docker ecosystem. Apart of basic support to run Docker containers, Openshift provides a set of PaaS services, based on pre-configured templates for most common web application technologies (Node.js, Python WSGI, Java  Servlets, PHP, …) and Continuous Integration & Deployment (Jenkins pipelines , or more simple Openshift “Source to Image(S2I)” build, which is described later).

Currently Openshift Online is offered in two variants Starter(free, but limited to 1GB memory and 2 virtual CPUs and forced hibernation of containers) and Pro. But you can easily test Openshift also locally on you computer with Minishift or run Openshift locally in Docker container.  I found Minishift  particularly useful, when I played with it.

Basic unit of deployment in Openshift is a pod, which contains one or more Docker containers, which run together. Pod is then abstracted as a sevice. Service can run several pod instances load balanced (through HAProxy) – e.g. service enables horizontal scaling of pods.

There are many possibilities how to get Docker images to be run in pods:

  • Easiest way is to use existing image available in some registry ( e.g. Docker Hub).  Such image can be imported into Openshift as an image-stream, which is then deployed in a pod using defined deployment configuration (memory, cpus, volumes, environment variables, …). But not every docker image will run in Openshift out of hand, there are some limitations of which I’ll speak later.
  • Build an image and then deploy it. Openshift is quite flexible in ways how to create new image:
    • Dockerfile build –  use ‘classic’ docker build from Dockerfile
    • Source to Image (S2I) build – use special base image (builder) to create new image using  provided source code (from git repo)
    • Custom build – similar to Source to Image but even more flexible
    • Pipeline build –  building image using Jenkins pipeline

Openshift can be managed either from web UI or console application oc. Both require a bit of understanding of Openshift architecture to get started with them.

Openshift has a good documentation, so I refer reader to it for details.

Deploying Apps from Docker Image

Disregarding all fanciness of PaaS finally it’s about four basic things:
a) get my  application, which is running fine  locally in my development environment, to the Web quickly and painlessly
b) have it running there reliably and securely
c) scale easily as traffic grows (ideally automatically within some given limits)
d) have possibility to update it easily and instantly (possibly automatically)

I did have a couple of applications, that did run locally in Docker container, so I was quite exited that I can easily just push the existing Docker images to Openshift and they will happily run there forever.  Unfortunately ( or maybe fortunately because I did learn  quite few things) it was naive expectation and it was not so straightforward. Locally in my containers I did not care very much about security, so all apps run as root in local containers. But Openshift is much more careful, not only that you cannot run containers as root, but basically they are run with arbitrary uid.  So basically it meant for me to rewrite completely Docker files. And I needed quite a few iterations to finds where access rights can cause problem for arbitrary user. For these experiments Minishift was quite valuable as I can quickly push images to it (enable access to Minishift Docker registry as described here).

So my recommended flow for preparing images for Openshift is:

  1. Create and image that runs as non-root user and test it in local Docker
  2. Now run it  as arbitrary user (random uid and 0 as guid) – fix any access issues
  3. Optionally test locally in Minishift
  4. Deploy to Openshift

Most resistant to run as arbitrary user was Postgresql ( Openshift has it’s own great image for Postgresql, but unfortunately it’s missing Postgis, which one of my applications required, so no shortcut here either).

Concerning application updates Openshift deployment is updated automatically when new images is available (in image-stream, for remote repository it means triggering update of the image-stream) . Default is rolling deployment –   olds pods continue running until new pods are ready to take over, then old pods are deleted. If deployment fails it can be rolled out to previous working deployment.

Openshift also provides manual and automatic scaling – by adding pods to services either as result of admin actions or as results of reaching some load threshold.

Deploying Apps from Source

Building and deploying apps from source works great for “standard” applications (like Python Flask)  with already available “Source to Image” builders or templates.  In this case new deployment means just linking git repository to appropriate builder (with Add to project in web UI or oc new-app builder_image~repo_url). In my case none of  my applications was “standard” so pre-built Docker images were easiest approach (although I thing I could make my python app to build and run with default S2I builder image with some more tweaking).

If default S2I builders are not enough (for instance we do not have one for Rust), we can relatively easily create our own, which I have done here as an exercise for my toy Rust application .

S2I build is running these steps (bit simplified):

  1. Inject source code into builder image (download from repo, tar and then untar in the image)
  2. With builder image run assemble command
  3. Commit resulting container to new image
  4. Run that new image with run command

So the S2I builder image is basically a Docker image with 2 shell scripts – assemble and run.

So here is an example of S2I builder image for toy Rust project:

# rust-builder
FROM scorpil/rust:nightly
MAINTAINER ivan.zderadicka@gmail.com

# TODO: Rename the builder environment variable to inform users about application you provide them
ENV BUILDER_VERSION 1.0

# Set labels used in OpenShift to describe the builder image
LABEL io.k8s.description="Rust Build for langgen" \
      io.k8s.display-name="Rust Builder 1.0" \
      io.openshift.expose-services="8080:http" \
      io.openshift.tags="builder,rust"


# Install required packages here:
RUN apt-get update &&\
    apt-get install -y wget &&\
    apt-get clean


# Copy the S2I scripts to /usr/local/bin, 
LABEL io.openshift.s2i.scripts-url=image:///usr/local/bin
COPY ./s2i/bin/ /usr/local/bin

# Drop the root user and make the content of /opt/app-root owned by user 1001

RUN adduser --uid 1001 appuser &&\
 mkdir /opt/app &&\
 chown -R 1001:1001 /opt/app

WORKDIR /opt/app

# This default user is created in the openshift/base-centos7 image
USER 1001

# Set the default port for applications built using this image
EXPOSE 8080

# Set the default CMD for the image
CMD ["/usr/local/bin/usage"]

with this assemble script:

#!/bin/bash -e
#
# S2I assemble script for the 'rust-builder' image.
# The 'assemble' script builds your application source so that it is ready to run.
#
# For more information refer to the documentation:
#	https://github.com/openshift/source-to-image/blob/master/docs/builder_image.md
#

# If the 'rust-builder' assemble script is executed with the '-h' flag, print the usage.
if [[ "$1" == "-h" ]]; then
	exec /usr/local/bin/usage
fi

# Restore artifacts from the previous build (if they exist).
#
if [ "$(ls /tmp/artifacts/ 2>/dev/null)" ]; then
  echo "---> Restoring build artifacts..."
  mv /tmp/artifacts/. ./
fi

echo "---> Installing application source..."
cp -Rf /tmp/src .
cd ./src

echo "---> Building application from source..."
# TODO: Add build steps for your application, eg npm install, bundle install, pip install, etc.
cargo build --release &&\
cargo test --release &&\
cd ..
cp src/target/release/serve .
cp -Rf src/web .
rm -rf src
wget https://sherlock-holm.es/stories/plain-text/cano.txt

and this run script:

#!/bin/bash -e
#
# S2I run script for the 'rust-builder' image.
# The run script executes the server that runs your application.
#
# For more information see the documentation:
#	https://github.com/openshift/source-to-image/blob/master/docs/builder_image.md
#

exec ./serve -a 0.0.0.0 -p 8080 ./cano.txt

Once we have builder image we can deploy application – locally in minishift we just need to push builder image to Minishift Docker repository (above is the link how to enable access to this repository), for hosted service we should push image to Docker Hub and then import it to Openshift with:

oc import-image your_namespace/rust-builder --confirm

and then create new application with oc command:

oc new-app rust-builder~https://github.com/izderadicka/langgen --name=langgen

This will create build configuration, run a build and deploy new application image created by the build.

Later if application source changes in git repo, we can either manually trigger rebuild or create a webhook in git repo that will start rebuild ( webhook will work only in hosted Openshift as public hook URL is needed).

If we change build image, again application will be automatically rebuild and re-deployed.

Deploying Apps from Template

For complex applications a template can be created, that deploys application. Template is YAML or JSON files that defines objects to be deployed and parameters that should be supplied during deployment. Here is example of template for Django application with  Postgresql database:

apiVersion: v1
kind: Template
labels:
  template: django-psql-persistent
message: |-
  The following service(s) have been created in your project: ${NAME}, ${DATABASE_SERVICE_NAME}.

  For more information about using this template, including OpenShift considerations, see https://github.com/openshift/django-ex/blob/master/README.md.
metadata:
  annotations:
    description: An example Django application with a PostgreSQL database. For more
      information about using this template, including OpenShift considerations, see
      https://github.com/openshift/django-ex/blob/master/README.md.
    iconClass: icon-python
    openshift.io/display-name: Django + PostgreSQL (Persistent)
    tags: quickstart,python,django
    template.openshift.io/documentation-url: https://github.com/openshift/django-ex
    template.openshift.io/long-description: This template defines resources needed
      to develop a Django based application, including a build configuration, application
      deployment configuration, and database deployment configuration.
    template.openshift.io/provider-display-name: Red Hat, Inc.
    template.openshift.io/support-url: https://access.redhat.com
  creationTimestamp: 2017-09-08T07:50:44Z
  name: django-psql-persistent
  namespace: openshift
  resourceVersion: "903"
  selfLink: /oapi/v1/namespaces/openshift/templates/django-psql-persistent
  uid: 6b1eaa09-946a-11e7-a11a-ee58d12b9e23
objects:
- apiVersion: v1
  kind: Secret
  metadata:
    name: ${NAME}
  stringData:
    database-password: ${DATABASE_PASSWORD}
    database-user: ${DATABASE_USER}
    django-secret-key: ${DJANGO_SECRET_KEY}
- apiVersion: v1
  kind: Service
  metadata:
    annotations:
      description: Exposes and load balances the application pods
      service.alpha.openshift.io/dependencies: '[{"name": "${DATABASE_SERVICE_NAME}", "kind": "Service"}]'
    name: ${NAME}
  spec:
    ports:
    - name: web
      port: 8080
      targetPort: 8080
    selector:
      name: ${NAME}
- apiVersion: v1
  kind: Route
  metadata:
    annotations:
      template.openshift.io/expose-uri: http://{.spec.host}{.spec.path}
    name: ${NAME}
  spec:
    host: ${APPLICATION_DOMAIN}
    to:
      kind: Service
      name: ${NAME}
- apiVersion: v1
  kind: ImageStream
  metadata:
    annotations:
      description: Keeps track of changes in the application image
    name: ${NAME}
- apiVersion: v1
  kind: BuildConfig
  metadata:
    annotations:
      description: Defines how to build the application
    name: ${NAME}
  spec:
    output:
      to:
        kind: ImageStreamTag
        name: ${NAME}:latest
    postCommit:
      script: ./manage.py test
    source:
      contextDir: ${CONTEXT_DIR}
      git:
        ref: ${SOURCE_REPOSITORY_REF}
        uri: ${SOURCE_REPOSITORY_URL}
      type: Git
    strategy:
      sourceStrategy:
        env:
        - name: PIP_INDEX_URL
          value: ${PIP_INDEX_URL}
        from:
          kind: ImageStreamTag
          name: python:3.5
          namespace: ${NAMESPACE}
      type: Source
    triggers:
    - type: ImageChange
    - type: ConfigChange
    - github:
        secret: ${GITHUB_WEBHOOK_SECRET}
      type: GitHub
- apiVersion: v1
  kind: DeploymentConfig
  metadata:
    annotations:
      description: Defines how to deploy the application server
    name: ${NAME}
  spec:
    replicas: 1
    selector:
      name: ${NAME}
    strategy:
      type: Recreate
    template:
      metadata:
        labels:
          name: ${NAME}
        name: ${NAME}
      spec:
        containers:
        - env:
          - name: DATABASE_SERVICE_NAME
            value: ${DATABASE_SERVICE_NAME}
          - name: DATABASE_ENGINE
            value: ${DATABASE_ENGINE}
          - name: DATABASE_NAME
            value: ${DATABASE_NAME}
          - name: DATABASE_USER
            valueFrom:
              secretKeyRef:
                key: database-user
                name: ${NAME}
          - name: DATABASE_PASSWORD
            valueFrom:
              secretKeyRef:
                key: database-password
                name: ${NAME}
          - name: APP_CONFIG
            value: ${APP_CONFIG}
          - name: DJANGO_SECRET_KEY
            valueFrom:
              secretKeyRef:
                key: django-secret-key
                name: ${NAME}
          image: ' '
          livenessProbe:
            httpGet:
              path: /health
              port: 8080
            initialDelaySeconds: 30
            timeoutSeconds: 3
          name: django-psql-persistent
          ports:
          - containerPort: 8080
          readinessProbe:
            httpGet:
              path: /health
              port: 8080
            initialDelaySeconds: 3
            timeoutSeconds: 3
          resources:
            limits:
              memory: ${MEMORY_LIMIT}
    triggers:
    - imageChangeParams:
        automatic: true
        containerNames:
        - django-psql-persistent
        from:
          kind: ImageStreamTag
          name: ${NAME}:latest
      type: ImageChange
    - type: ConfigChange
- apiVersion: v1
  kind: PersistentVolumeClaim
  metadata:
    name: ${DATABASE_SERVICE_NAME}
  spec:
    accessModes:
    - ReadWriteOnce
    resources:
      requests:
        storage: ${VOLUME_CAPACITY}
- apiVersion: v1
  kind: Service
  metadata:
    annotations:
      description: Exposes the database server
    name: ${DATABASE_SERVICE_NAME}
  spec:
    ports:
    - name: postgresql
      port: 5432
      targetPort: 5432
    selector:
      name: ${DATABASE_SERVICE_NAME}
- apiVersion: v1
  kind: DeploymentConfig
  metadata:
    annotations:
      description: Defines how to deploy the database
    name: ${DATABASE_SERVICE_NAME}
  spec:
    replicas: 1
    selector:
      name: ${DATABASE_SERVICE_NAME}
    strategy:
      type: Recreate
    template:
      metadata:
        labels:
          name: ${DATABASE_SERVICE_NAME}
        name: ${DATABASE_SERVICE_NAME}
      spec:
        containers:
        - env:
          - name: POSTGRESQL_USER
            valueFrom:
              secretKeyRef:
                key: database-user
                name: ${NAME}
          - name: POSTGRESQL_PASSWORD
            valueFrom:
              secretKeyRef:
                key: database-password
                name: ${NAME}
          - name: POSTGRESQL_DATABASE
            value: ${DATABASE_NAME}
          image: ' '
          livenessProbe:
            initialDelaySeconds: 30
            tcpSocket:
              port: 5432
            timeoutSeconds: 1
          name: postgresql
          ports:
          - containerPort: 5432
          readinessProbe:
            exec:
              command:
              - /bin/sh
              - -i
              - -c
              - psql -h 127.0.0.1 -U ${POSTGRESQL_USER} -q -d ${POSTGRESQL_DATABASE}
                -c 'SELECT 1'
            initialDelaySeconds: 5
            timeoutSeconds: 1
          resources:
            limits:
              memory: ${MEMORY_POSTGRESQL_LIMIT}
          volumeMounts:
          - mountPath: /var/lib/pgsql/data
            name: ${DATABASE_SERVICE_NAME}-data
        volumes:
        - name: ${DATABASE_SERVICE_NAME}-data
          persistentVolumeClaim:
            claimName: ${DATABASE_SERVICE_NAME}
    triggers:
    - imageChangeParams:
        automatic: true
        containerNames:
        - postgresql
        from:
          kind: ImageStreamTag
          name: postgresql:9.5
          namespace: ${NAMESPACE}
      type: ImageChange
    - type: ConfigChange
parameters:
- description: The name assigned to all of the frontend objects defined in this template.
  displayName: Name
  name: NAME
  required: true
  value: django-psql-persistent
- description: The OpenShift Namespace where the ImageStream resides.
  displayName: Namespace
  name: NAMESPACE
  required: true
  value: openshift
- description: Maximum amount of memory the Django container can use.
  displayName: Memory Limit
  name: MEMORY_LIMIT
  required: true
  value: 512Mi
- description: Maximum amount of memory the PostgreSQL container can use.
  displayName: Memory Limit (PostgreSQL)
  name: MEMORY_POSTGRESQL_LIMIT
  required: true
  value: 512Mi
- description: Volume space available for data, e.g. 512Mi, 2Gi
  displayName: Volume Capacity
  name: VOLUME_CAPACITY
  required: true
  value: 1Gi
- description: The URL of the repository with your application source code.
  displayName: Git Repository URL
  name: SOURCE_REPOSITORY_URL
  required: true
  value: https://github.com/openshift/django-ex.git
- description: Set this to a branch name, tag or other ref of your repository if you
    are not using the default branch.
  displayName: Git Reference
  name: SOURCE_REPOSITORY_REF
- description: Set this to the relative path to your project if it is not in the root
    of your repository.
  displayName: Context Directory
  name: CONTEXT_DIR
- description: The exposed hostname that will route to the Django service, if left
    blank a value will be defaulted.
  displayName: Application Hostname
  name: APPLICATION_DOMAIN
- description: Github trigger secret.  A difficult to guess string encoded as part
    of the webhook URL.  Not encrypted.
  displayName: GitHub Webhook Secret
  from: '[a-zA-Z0-9]{40}'
  generate: expression
  name: GITHUB_WEBHOOK_SECRET
- displayName: Database Service Name
  name: DATABASE_SERVICE_NAME
  required: true
  value: postgresql
- description: 'Database engine: postgresql, mysql or sqlite (default).'
  displayName: Database Engine
  name: DATABASE_ENGINE
  required: true
  value: postgresql
- displayName: Database Name
  name: DATABASE_NAME
  required: true
  value: default
- displayName: Database Username
  name: DATABASE_USER
  required: true
  value: django
- displayName: Database User Password
  from: '[a-zA-Z0-9]{16}'
  generate: expression
  name: DATABASE_PASSWORD
- description: Relative path to Gunicorn configuration file (optional).
  displayName: Application Configuration File Path
  name: APP_CONFIG
- description: Set this to a long random string.
  displayName: Django Secret Key
  from: '[\w]{50}'
  generate: expression
  name: DJANGO_SECRET_KEY
- description: The custom PyPi index URL
  displayName: Custom PyPi Index URL
  name: PIP_INDEX_URL


Conclusion

I only explored few basic possibilities of the Openshift platform,  it’s promising, but not without surprises for unaware user. Platform is relatively complex and requires good understanding of  underlying concepts.  Naive reuse of  locally working Docker image is not enough, one must think ahead about security related limitations of the platform. Building from source works like charm for standard web application, but for more complex application individual approach (creating own builder images or templates or using Jenkins pipelines) is needed. This requires more efforts and deeper dive into the platform, but can fully automate deployment of any complex application.


Secret Sharing Is Caring Too

$
0
0

In todays digital world passwords and other types of secrets are omnipresent and they secure access to various assets dear to our hearts, some of those can have tremendous tangible or moral value. For such assets it’s worth to select really good and strong password, which basically means long and hard to remember. How to ensure ourselves in case of memory failure? We can write it down and lock in secure place, share with trusted person etc., but still there is one point of of failure – secure place can be robbed, that person can betray us. Can cryptography  provide us with better options?  Yes it can with help of method called Secret sharing – we can split secret into n parts – called shared secrets – and distribute them to different places/people. Later we (or someone else) need to collect k (k > 0 and k <= n) shared secret to recover original secret. k is called threshold and it is defined when generating shared secrets – so we for instance generate n=5 shared secrets, but only k=3 will be needed to recover original secret.

I believe you can easily imagine  many other real life scenarios where secret sharing can be useful and for sure it’s used in many applications and systems today. Cryptography provides several algorithms for secure (by design) secret sharing.  Most common is Shamir’s Secret Sharing based on linear algebra approach. There are many tools and libraries for Shamir’s scheme (and further advancements of original algorithm),  you can for instance try ssss, which provides command line tool that you can easily install into your Linux and also there is an online demo. Another family of secret sharing schemes is based on Chinese Reminer Theorem, where especially Asmuth-Bloom scheme is interesting.  I have not seen many implementation for Asmuth-Bloom secret sharing so I created one in Rust.

My implementation contains also command line utility so you can easily play with in on your computer:

If you do not have cargo and rustc you can easily install with

curl -sSf https://static.rust-lang.org/rustup.sh | sh

Then install with cargo:

cargo install asmuth_bloom_secret_sharing

And create shared secrets:

#ensure cargo binaries are on the path
PATH=$PATH:$HOME/.cargo/bin
# and generate shared secrets
asmuth_bloom_secret_sharing generate -n 5 -t 3 my_biggest_secret

The output is:

200p2l:400p4r:2v6a0f1bvhdgqjn0c05eg11oia9v
200p2l:400p5h:m08u392jbfptt071kv3eq3teqaq
200p2l:400p65:2bjrjd73hgsavd805g5g7ohv7kre
200p2l:400p6h:3cr8v18kfqmon2h9vl7j1fi779eo
200p2l:400p71:1k03mp7e6fg2ap6ahi1tt3p0bbtf

Each line represents one shared secret. Later we can recover original secret from any 3 shared secrets (as threshold was 3):

asmuth_bloom_secret_sharing recover -t 3 <<EOF
200p2l:400p5h:m08u392jbfptt071kv3eq3teqaq
200p2l:400p6h:3cr8v18kfqmon2h9vl7j1fi779eo
200p2l:400p4r:2v6a0f1bvhdgqjn0c05eg11oia9v
EOF
echo

And indeed we will see our secret again:

my_biggest_secret


Viewing all 83 articles
Browse latest View live


Latest Images